Element Selector
Element selectors identify specific elements on a web page so your workflow blocks can interact with them.
Omnilogin supports three types of selectors: CSS Selectors, XPath expressions, and screen Coordinates.
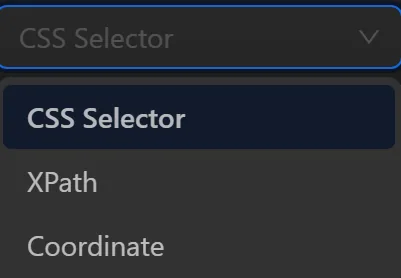
CSS Selector
A selector where you use a CSS selector to identify the element you want to perform the desired action on. You can refer to the documentation to use CSS Selectors in your automation process.
To get the CSS Selector, you can use the Omnilogin selector or get it manually.
Example of getting CSS Selector using Omnilogin selector
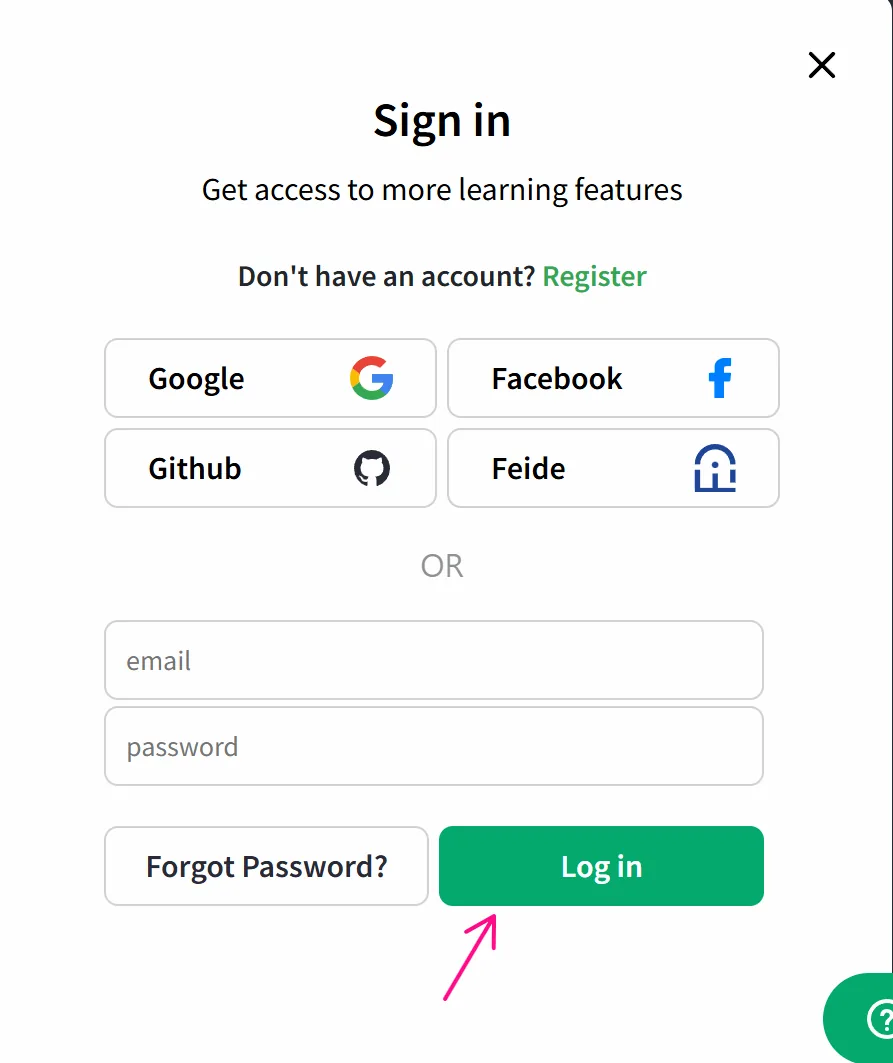
The process is that, you want to click the Log in button to log into the w3school page after entering the account information.
To click that buttonyou need to get the CSS Selector of that button.
To obtain the CSS selector, use Omnilogin's selector tool as follows
First, create a process and use the Open URL node to open the w3school page.
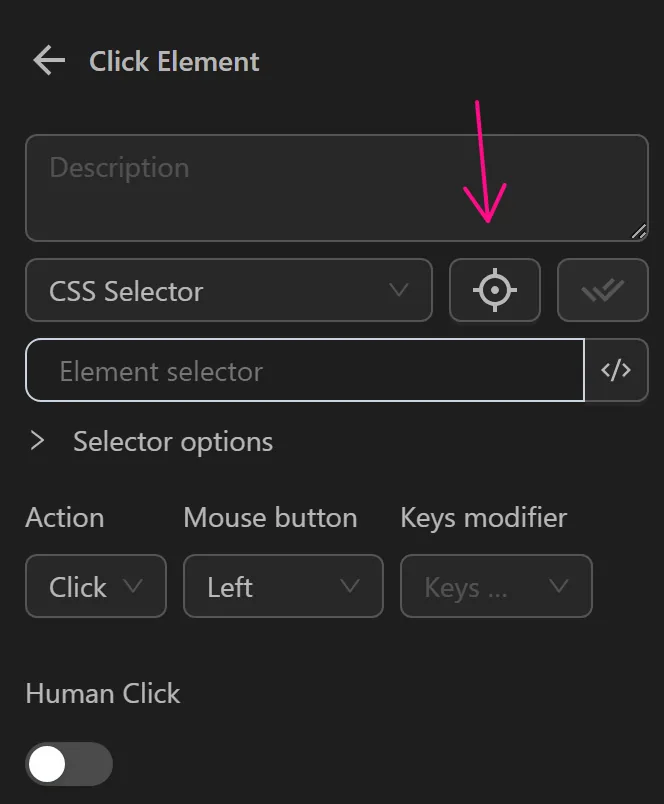
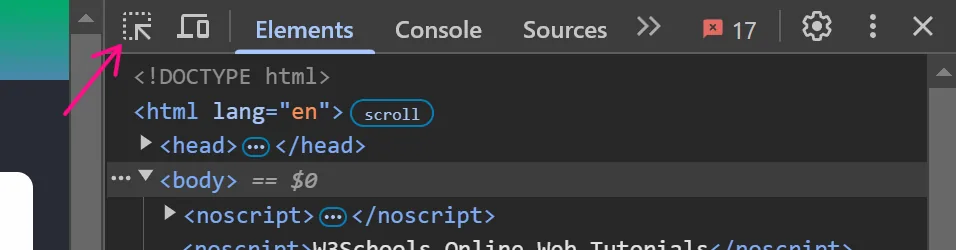
Next, since we want to click the Login button, we need to use the Click Element node. When entering the node's configuration, you'll see a magnifying glass icon. Click the icon and, you'll automatically be taken to the active page. If clicking doesn't redirect you, then click on the open browser.
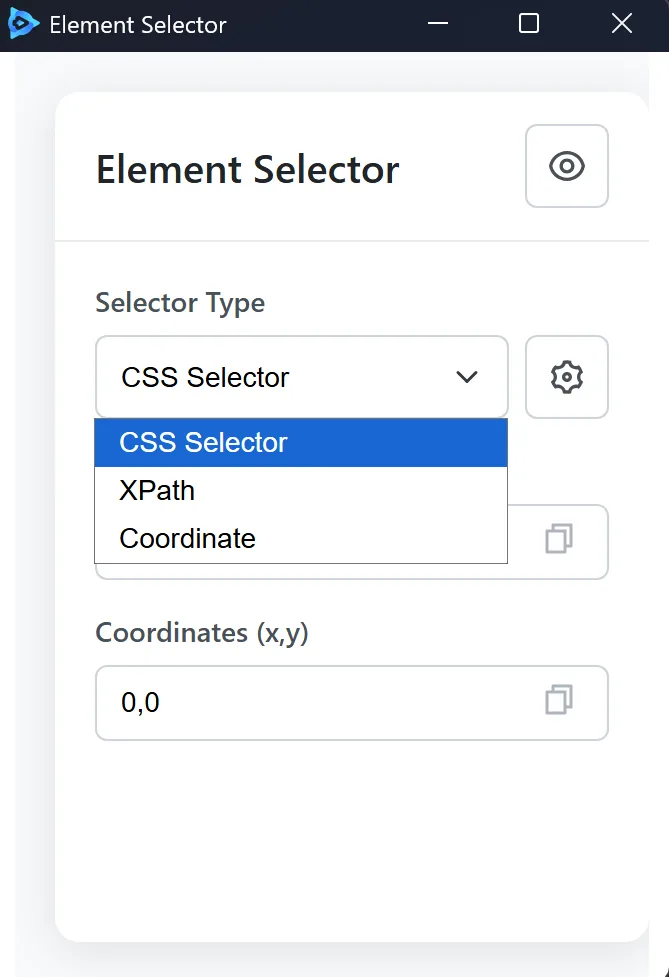
Then, you'll see the page appear with an Omnilogin popup like shown. Since we want to get the CSS Selector, we will choose CSS Selector.
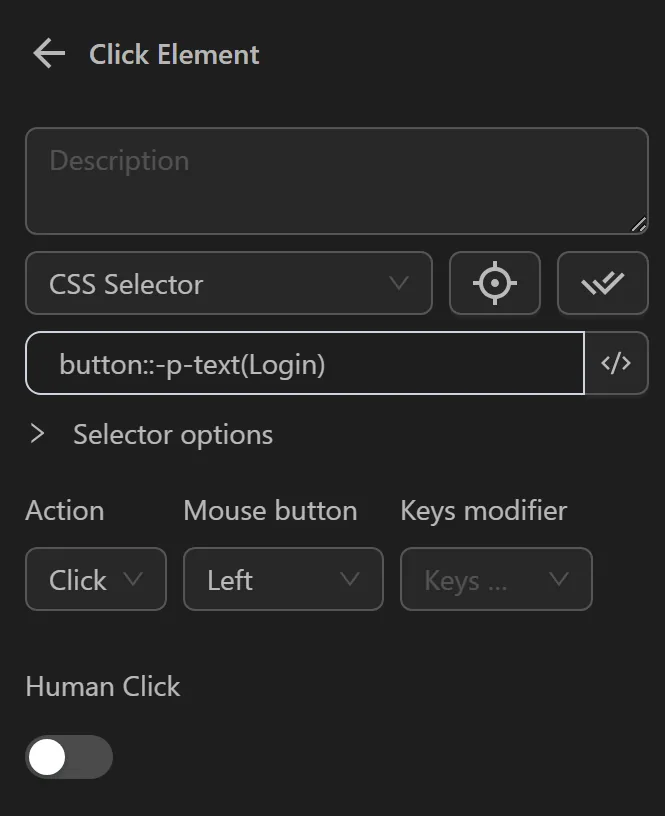
Next, click on the Login button to get the selector. At that time, a selector will appear as button::-p-text(Login).
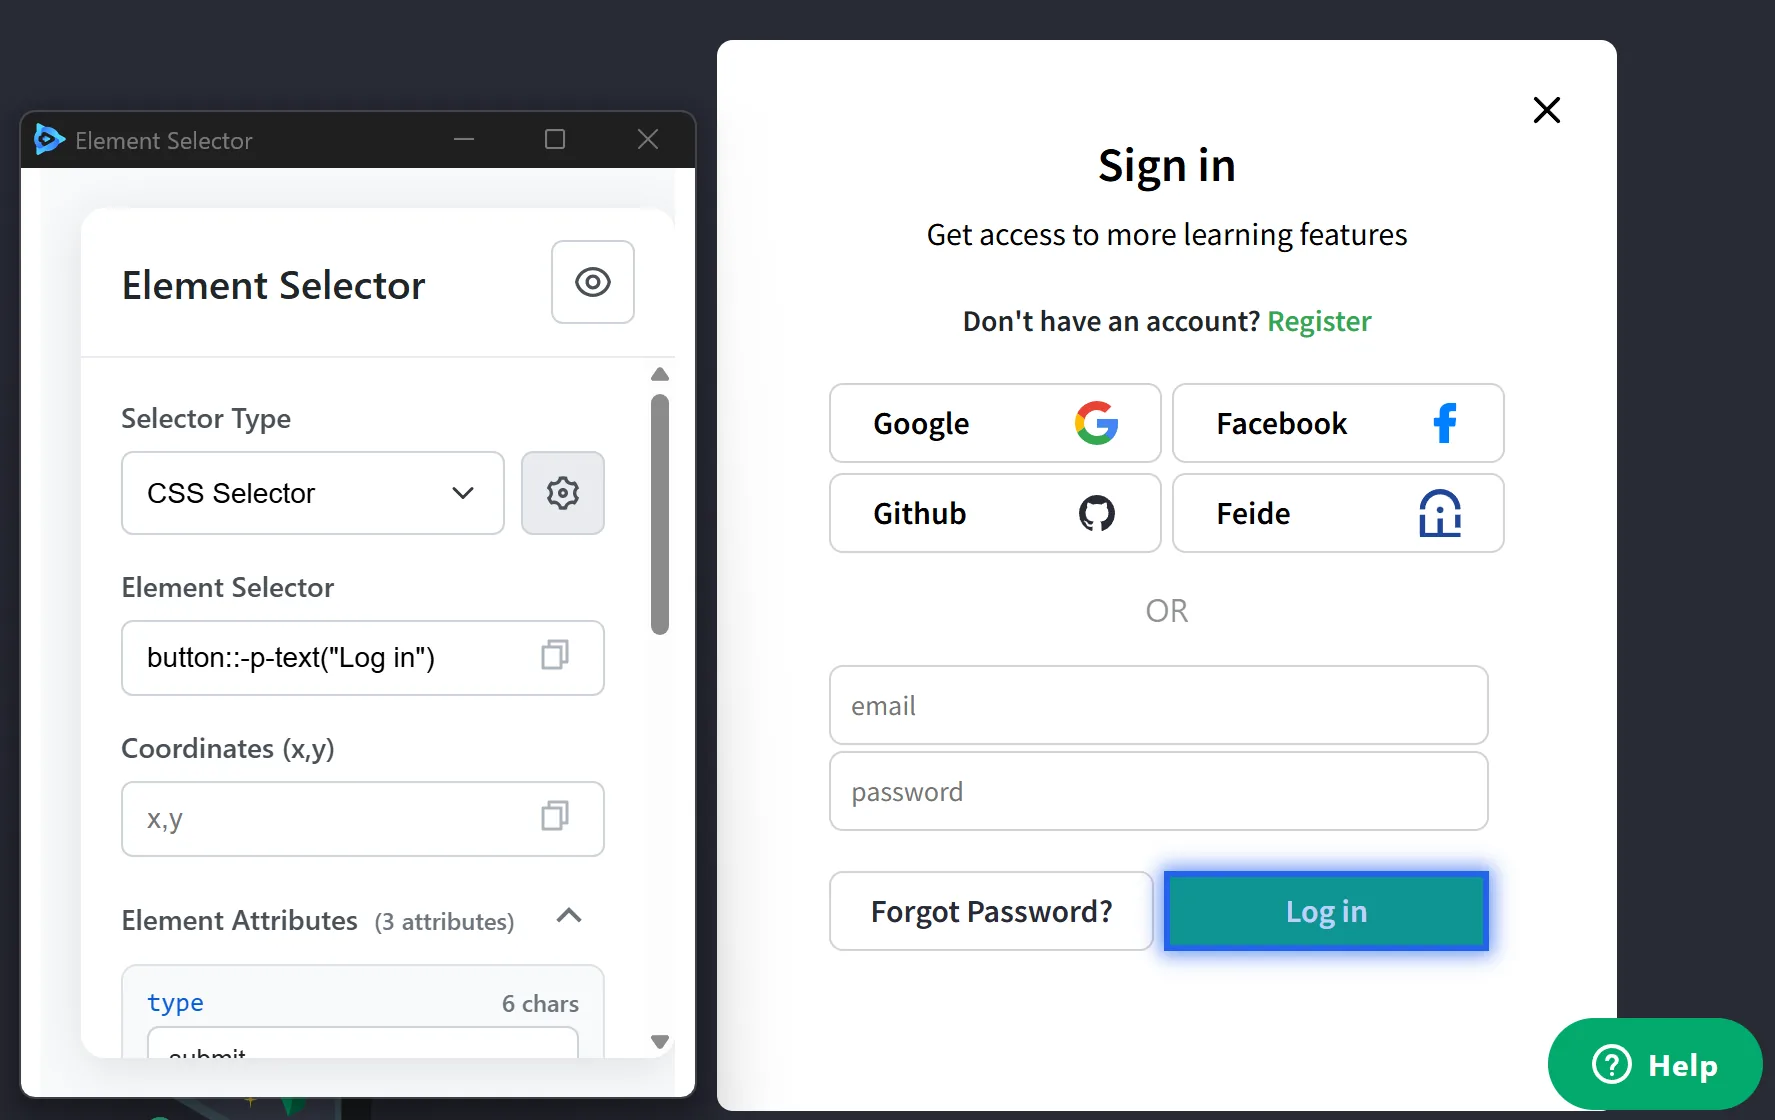
Copy it and paste it into the Click element node as shown.
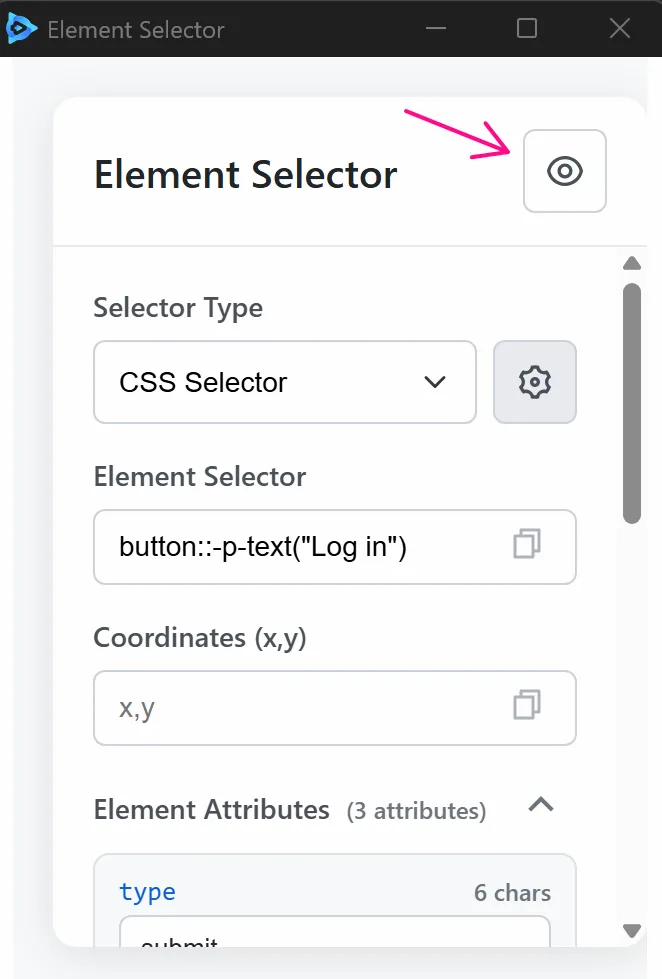
Additionally, you can turn off selector grabbing by clicking the eye icon.
When running the Click Element node, it will click on the Login button.
Example of getting CSS Selector manually
The process is that, you want to click the Log in button to log into the w3school page after entering the account information.
To click that button, you need to get the CSS Selector of that button.
To get that CSS Selector, you can manually do the following:
First, create a process and use the Open URL node to open the w3school page.
Next, press F12 or right-click and select Inspect. A panel like this will appear on the page.
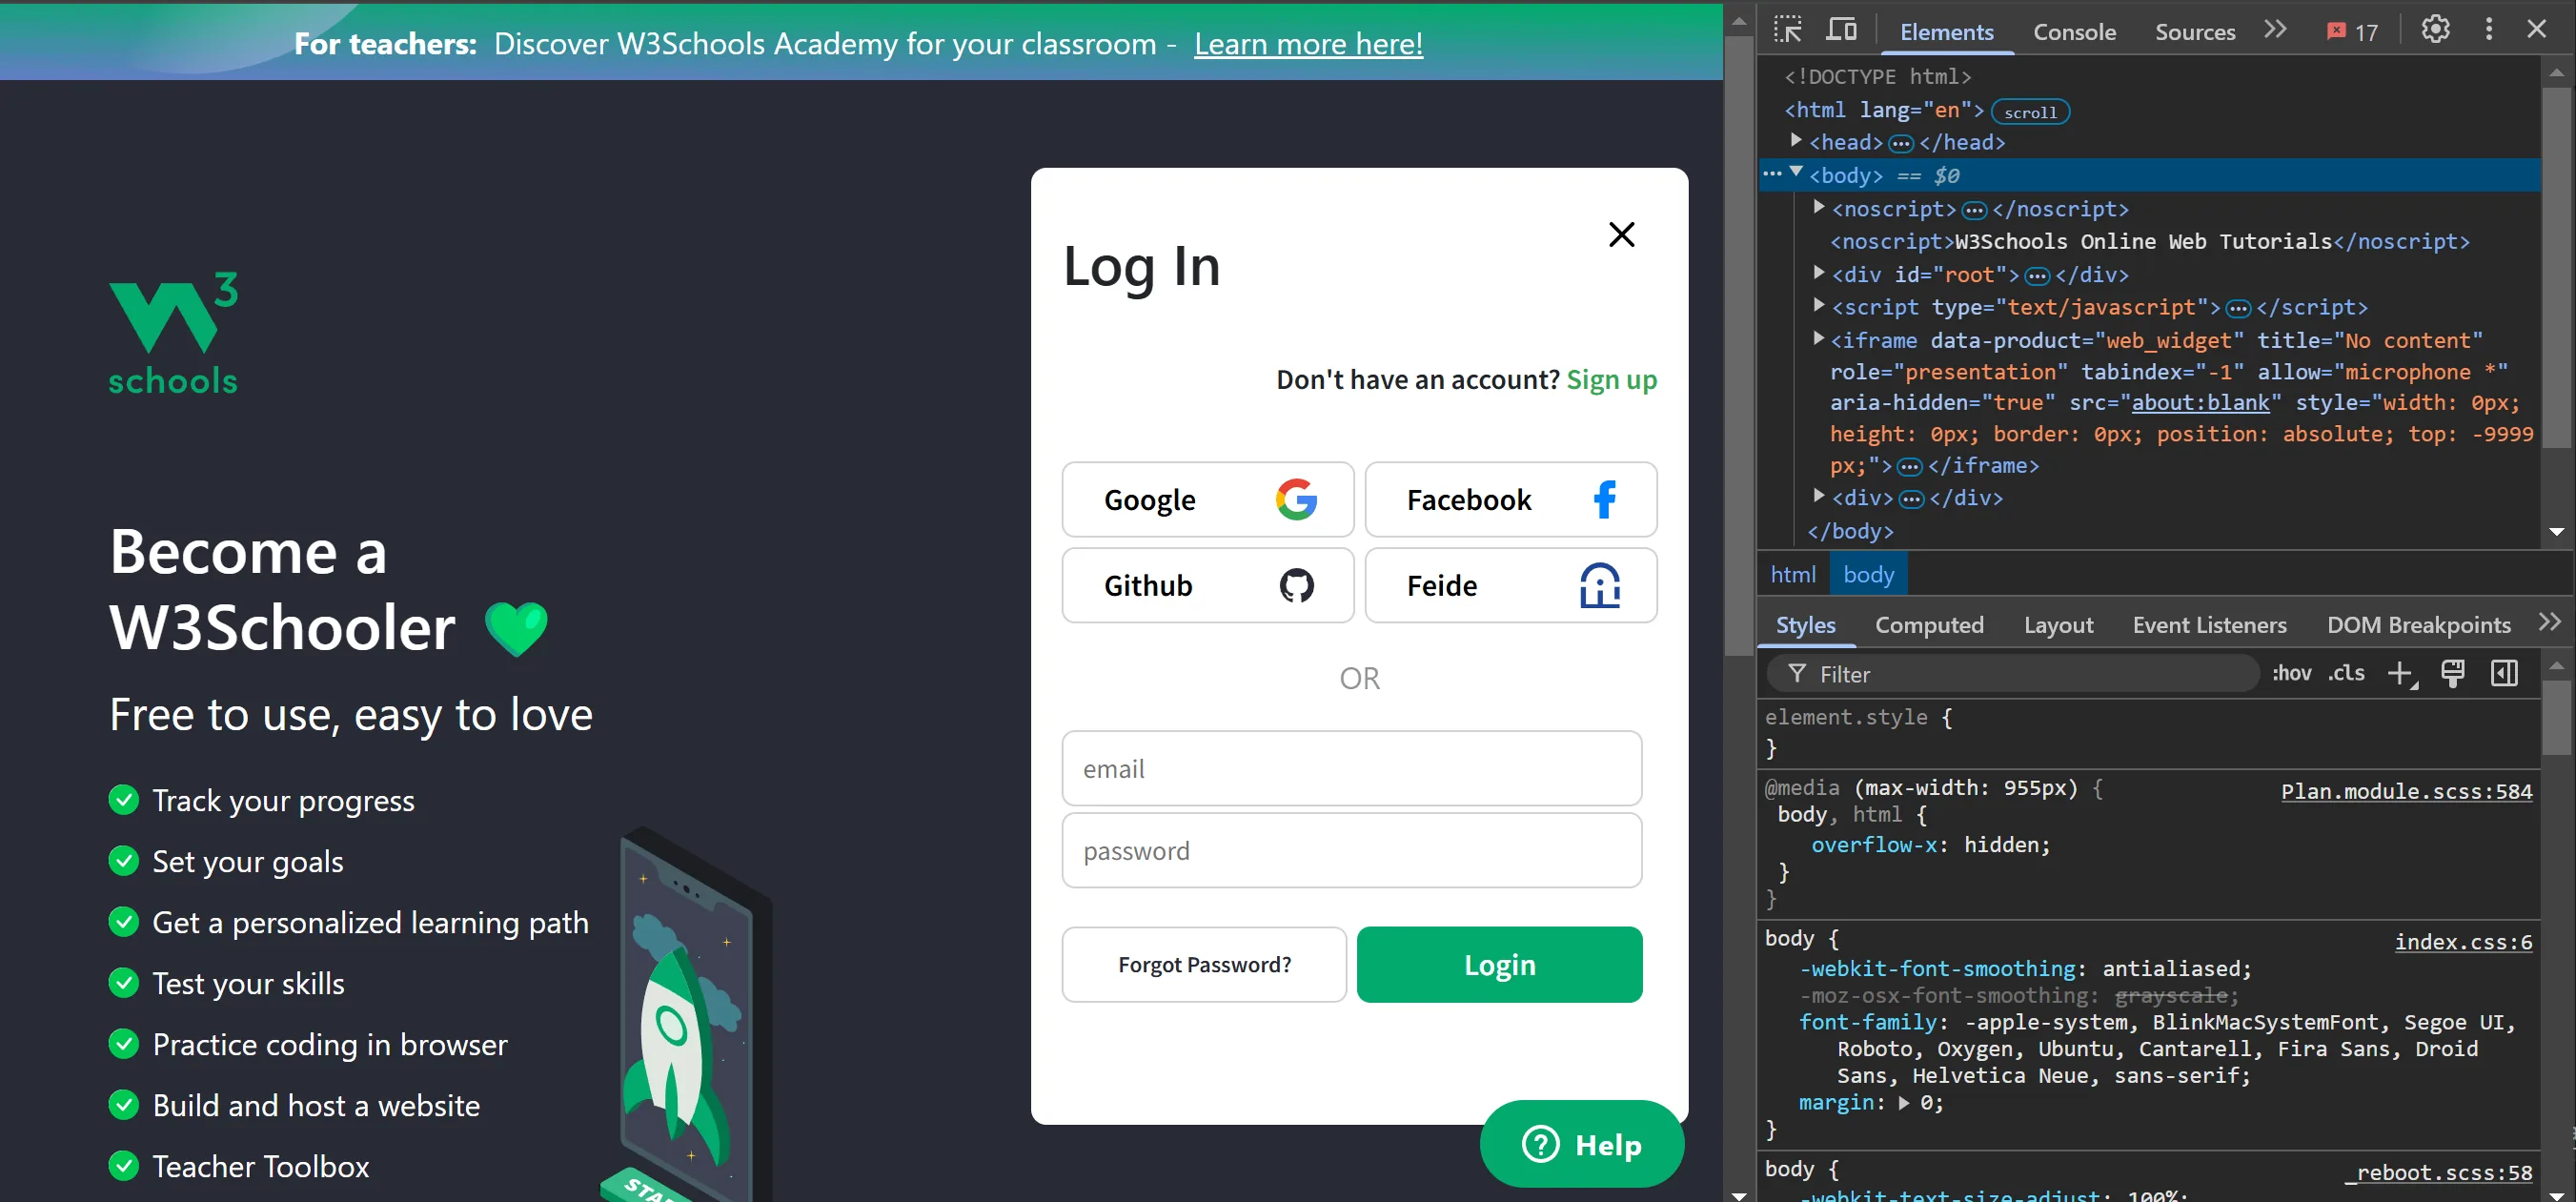
Next, click on this arrow.
Then click the Login button, you want the selector for. The corresponding element will be shown in the Element tab.
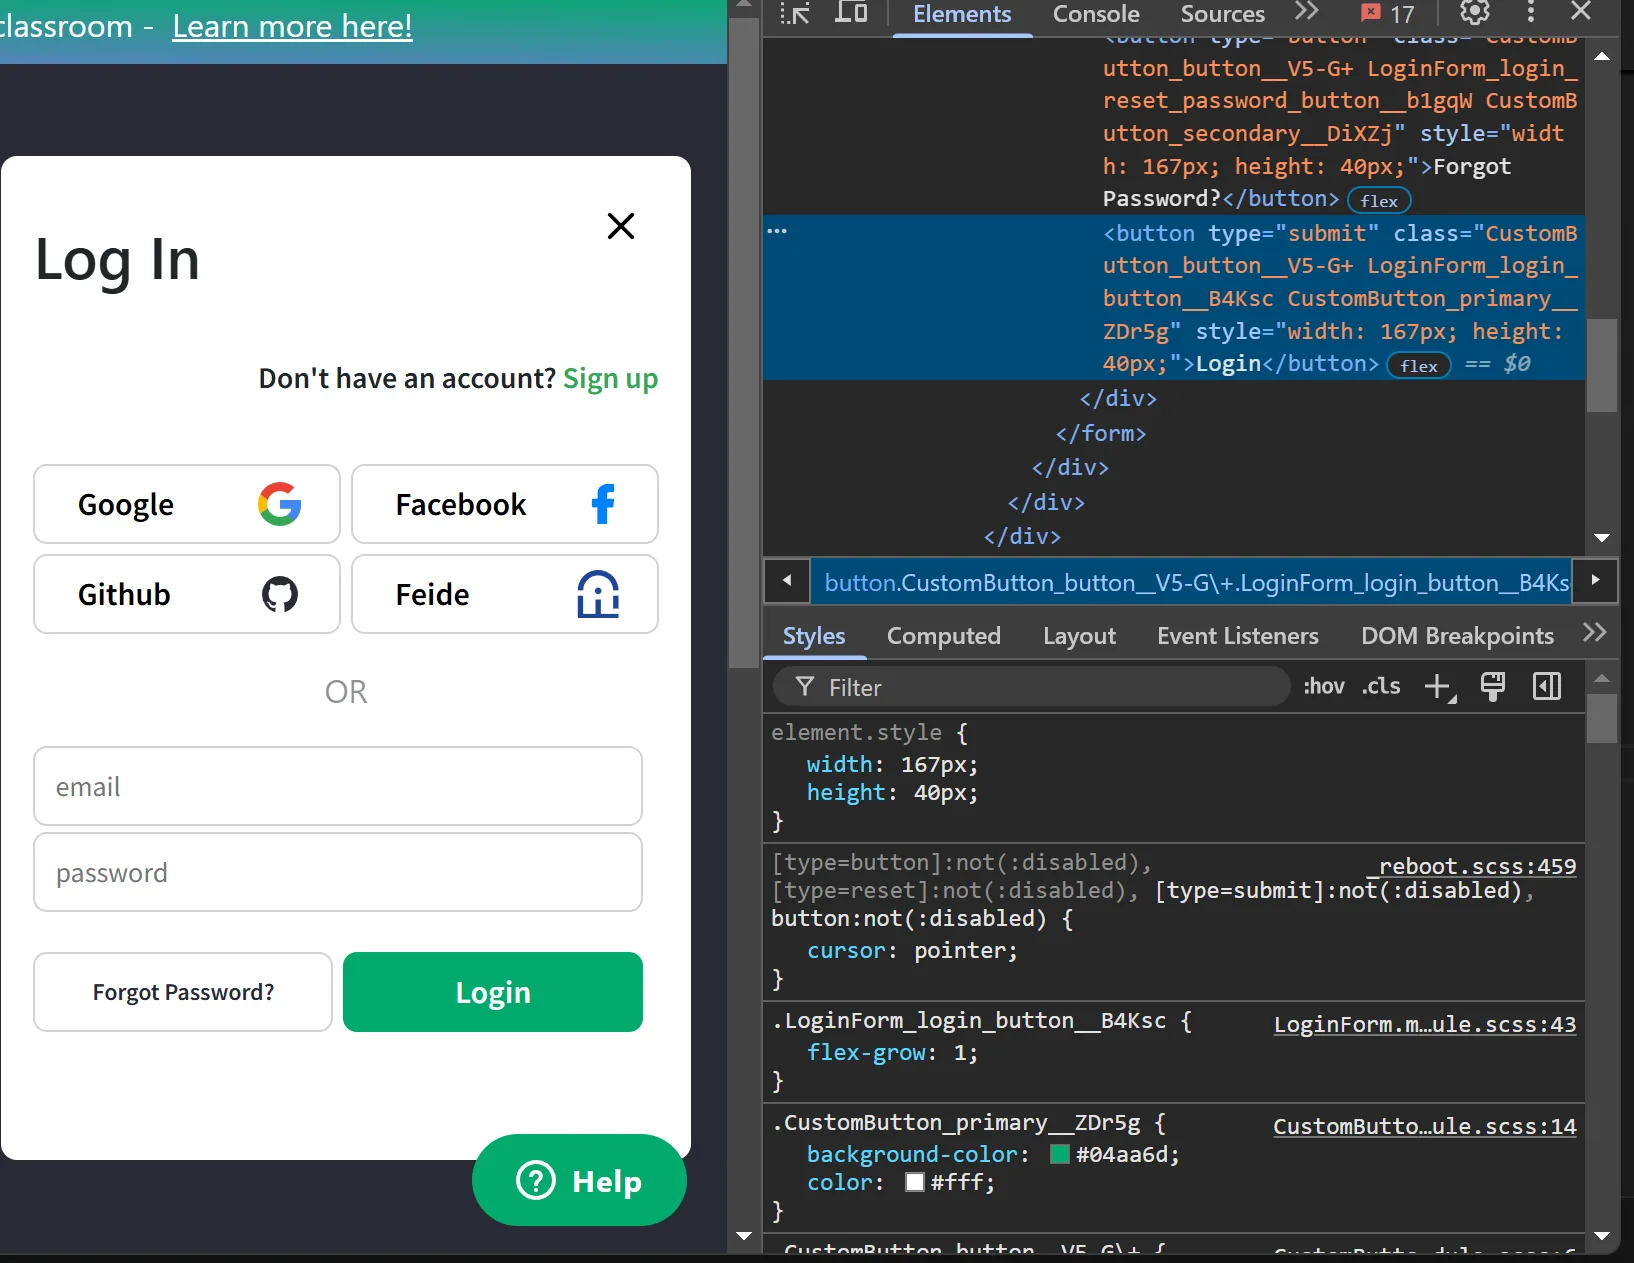
Then use the formula: card[attribute=value] from the documentation, where card corresponds to the button tag and [attribute=value] corresponds to [type="submit"] because the button tag has a type attribute.
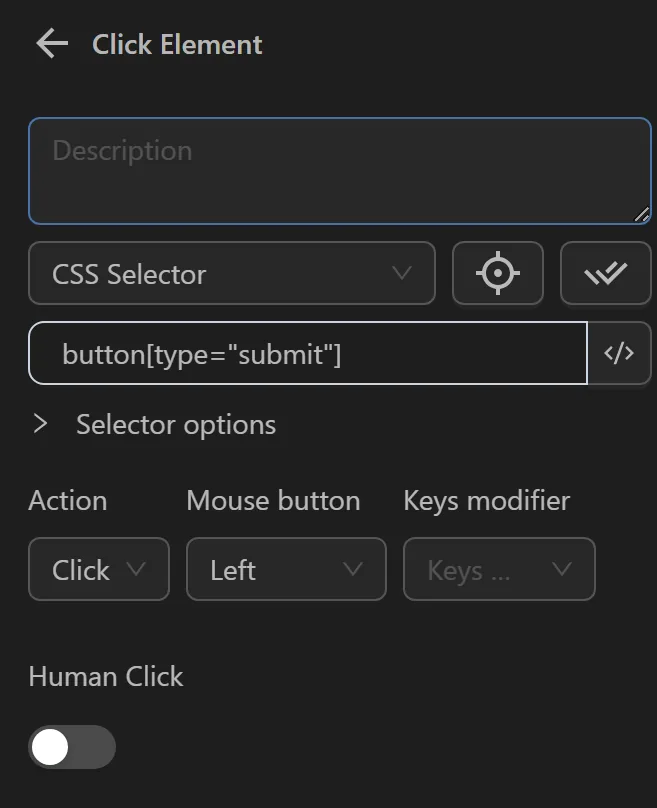
So, you will use the element selector: button[type="submit"] in the Click Element node.
When running the Click Element node, it will click on the Login button.
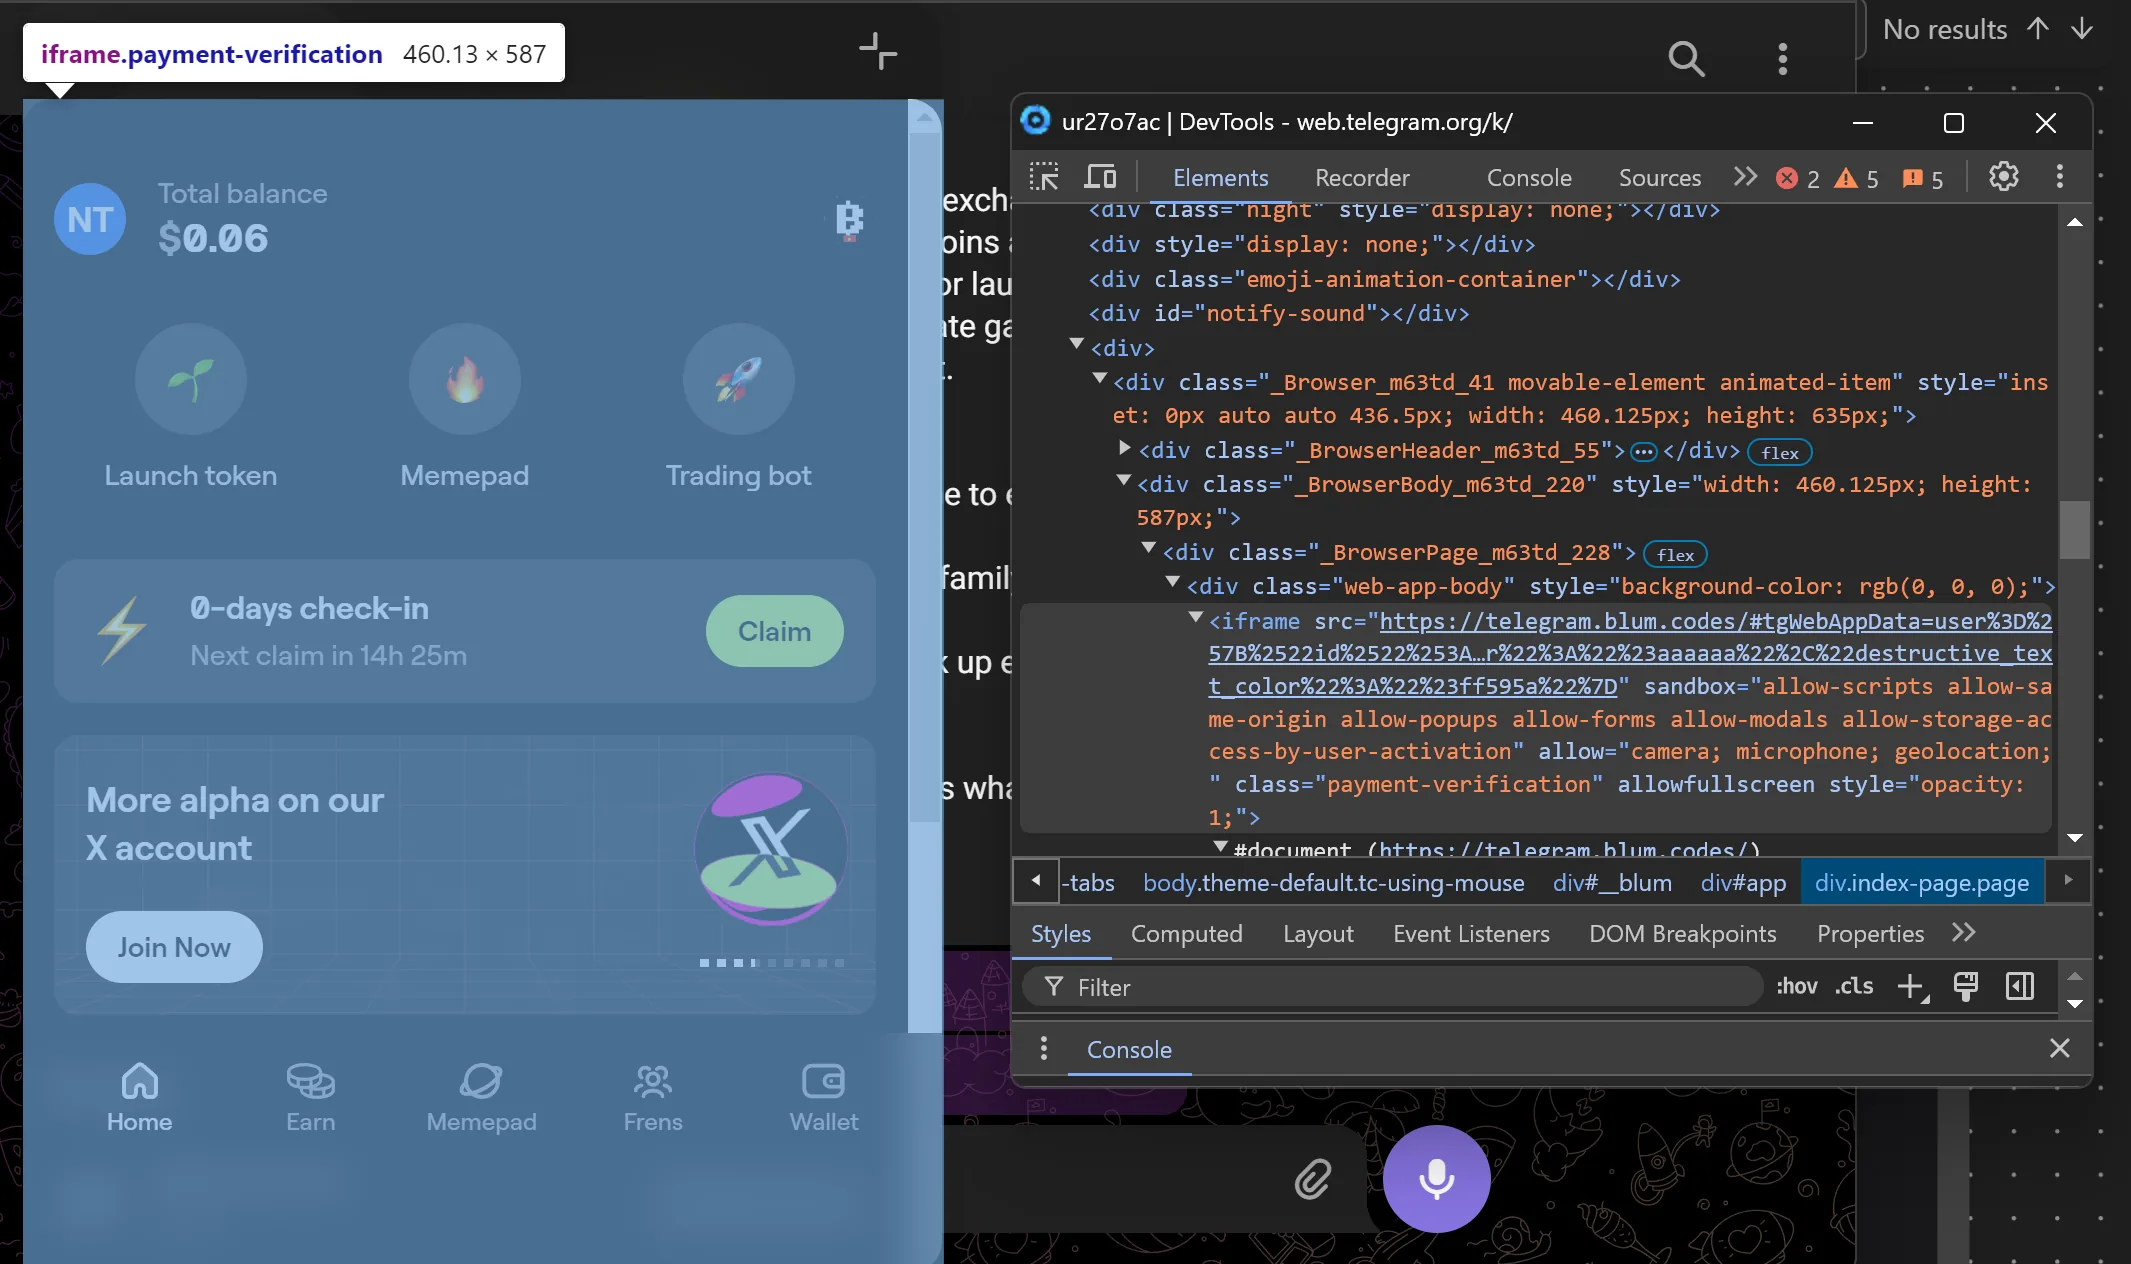
Example of getting CSS Selector inside an iframe
For example here, you need to click on the Claim button.
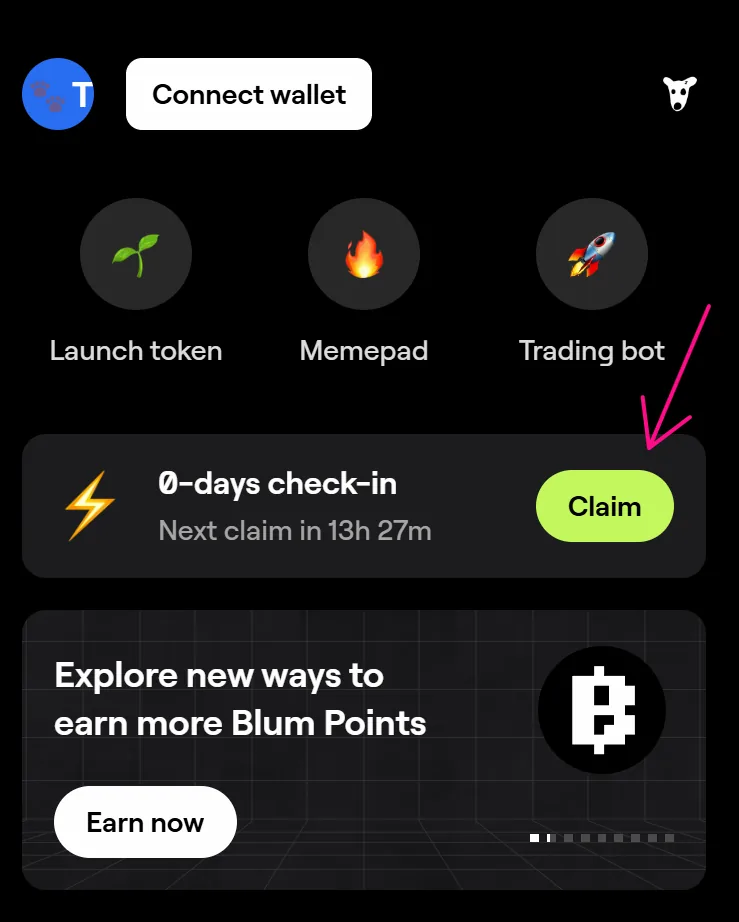
Normally, you only need to get the selector of that button: [class="kit-pill-claim reset is-state-claim is-type-default pill"] and use it in the Click Element node.
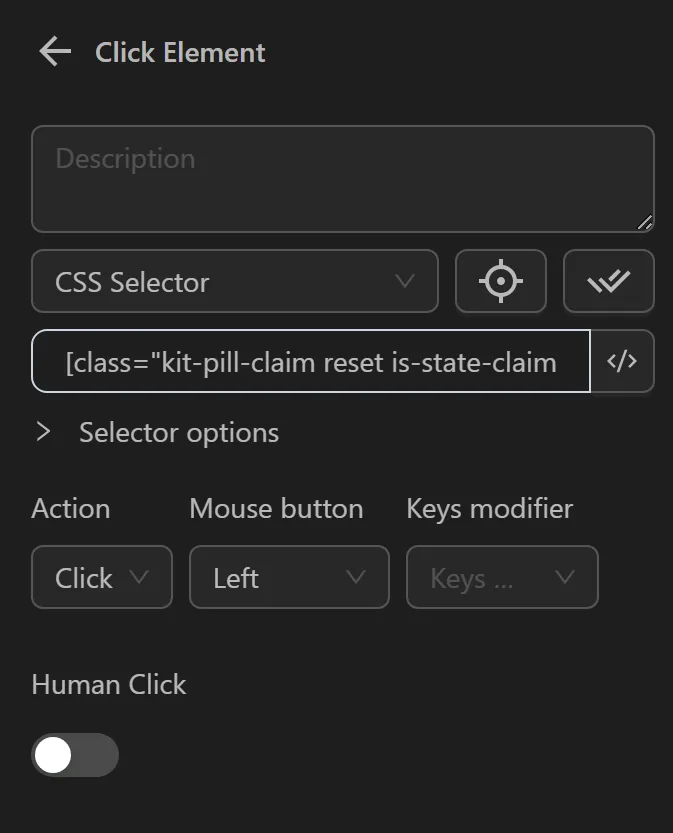
However, when checking the website, you'll see that the tag containing that button is inside an iframe.
Therefore, we must add the expression iframe|> in front of the above selector. The selector will now be: iframe|>[class="kit-pill-claim reset is-state-claim is-type-default pill"]
Then the Click Element node will appear as follows:
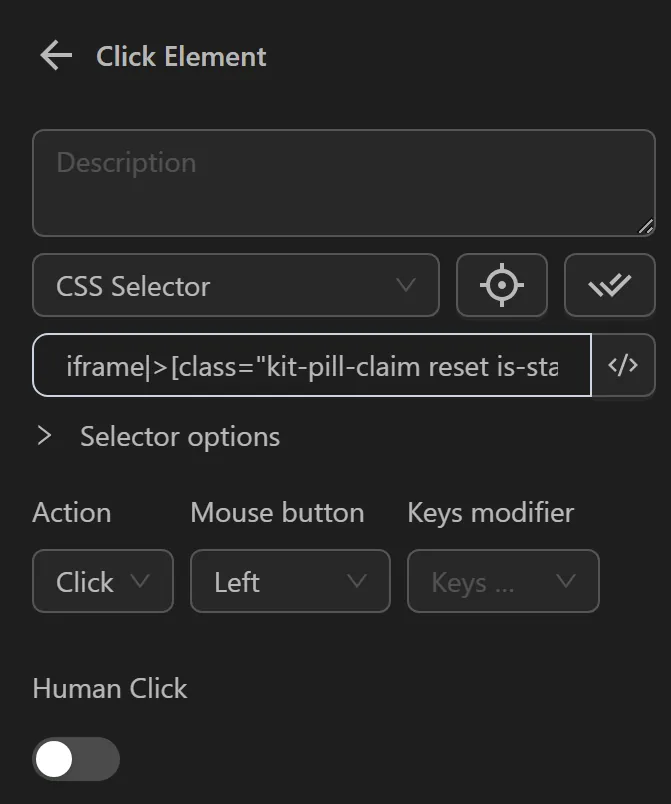
And when running, it will click the Claim button.
Example of getting a CSS Selector inside shadow-root(open)
In this case, the goal is to click on the MetaMask wallet icon to initiate a connection with the wallet. 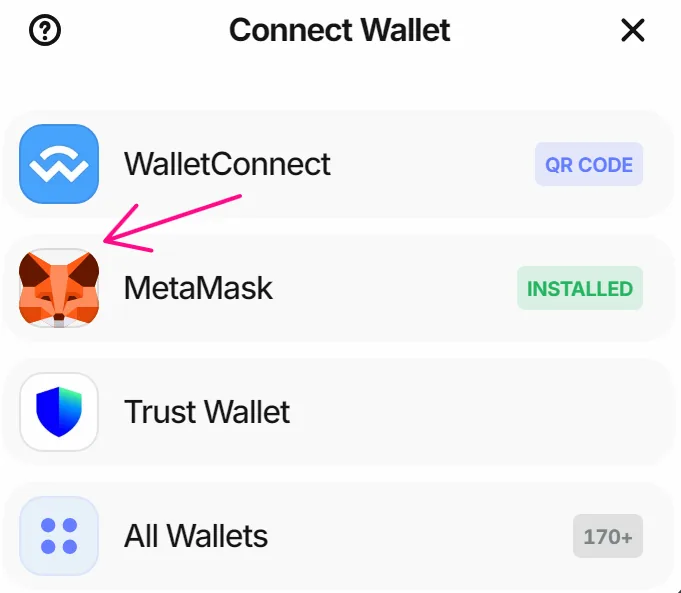
Normally, we would grab the selector for the MetaMask wallet icon as [name="MetaMask"] and use it in the Click element node like this: 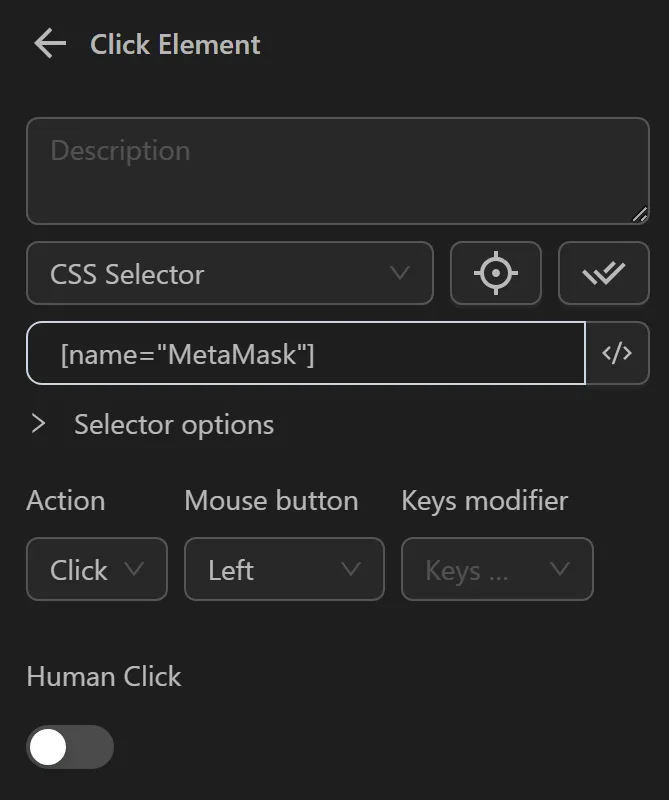
However, when inspecting the web page, we can see that the selector is nested inside multiple shadow-root elements. 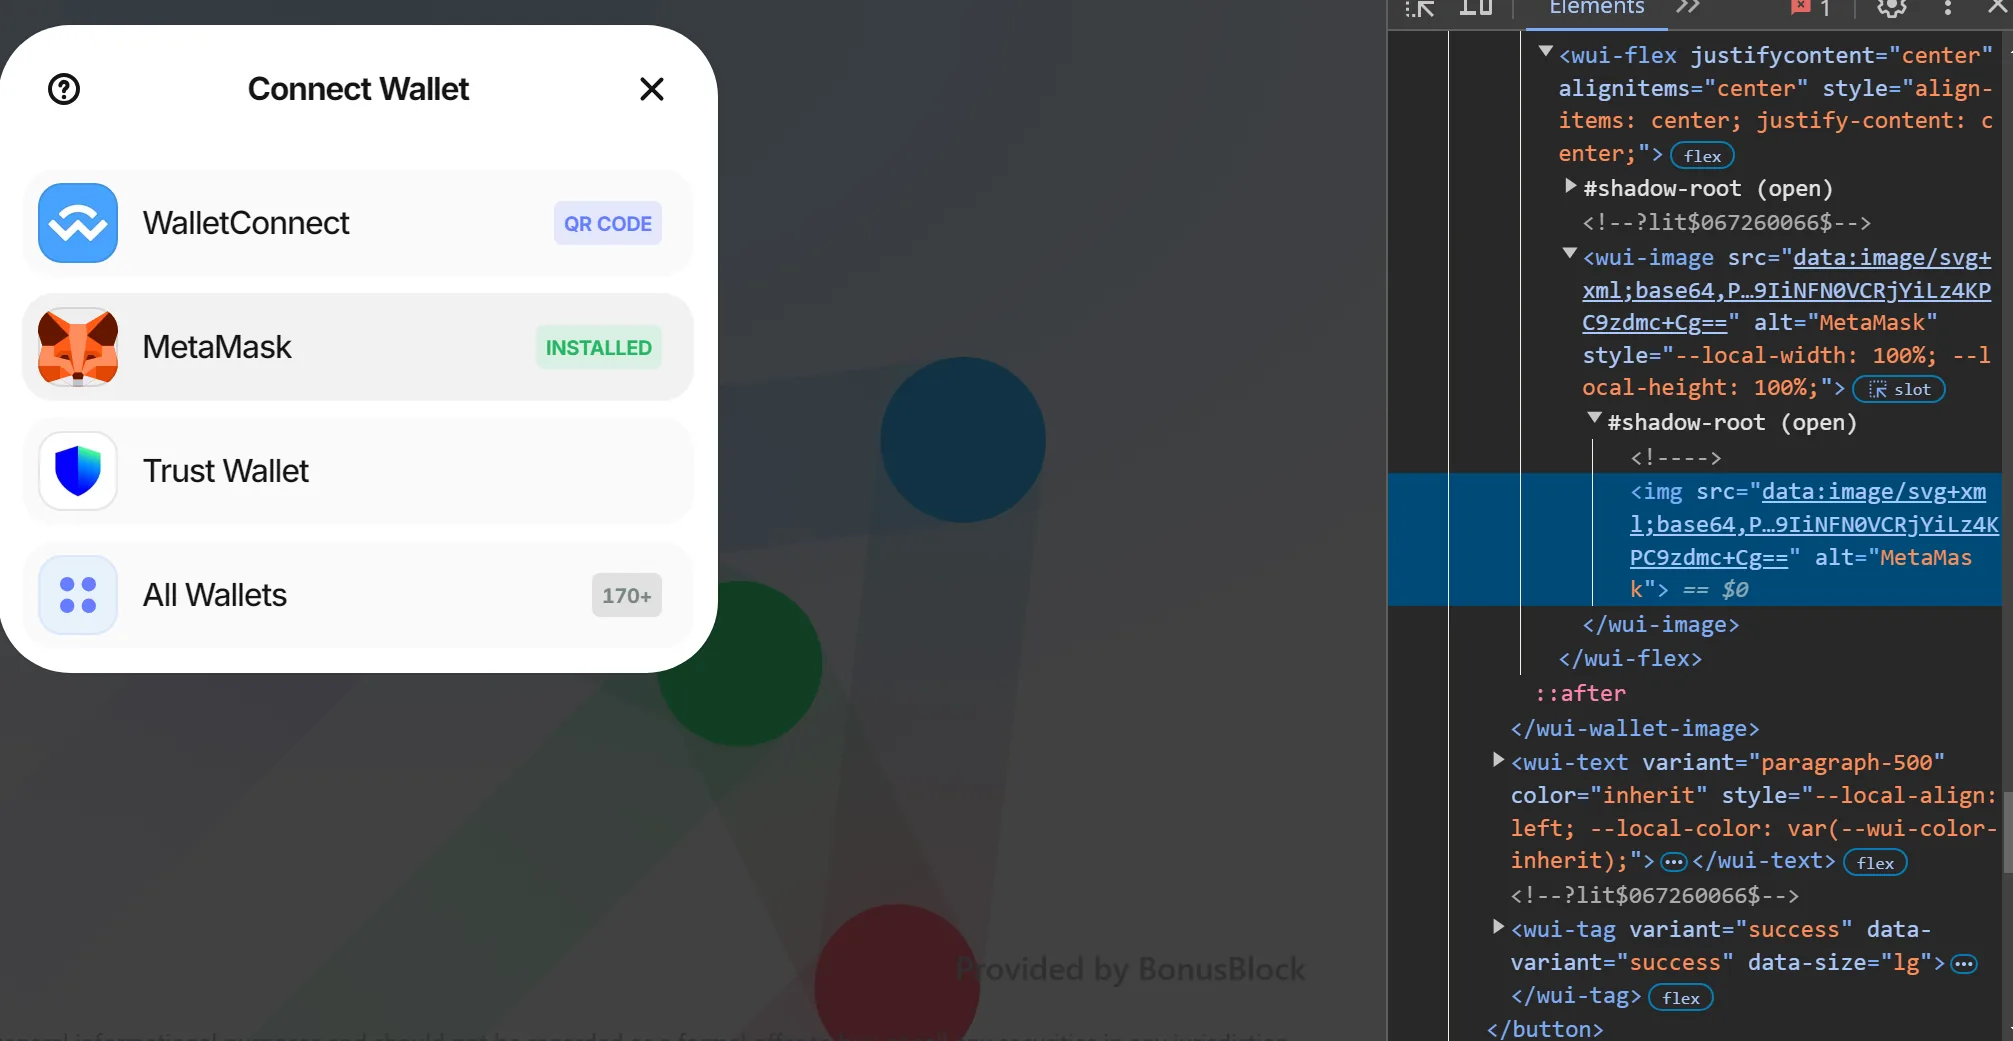
To access elements within shadow-root, we need to use the >>> expression between parent and child elements separated by shadow boundaries. Thus, the full selector would be written as: w3m-modal.open >>> w3m-router >>> w3m-connect-view >>> w3m-wallet-login-list >>> w3m-connector-list >>> w3m-connect-injected-widget >>> wui-list-wallet[name="MetaMask"]
Then we use this full selector in the Click Element node. 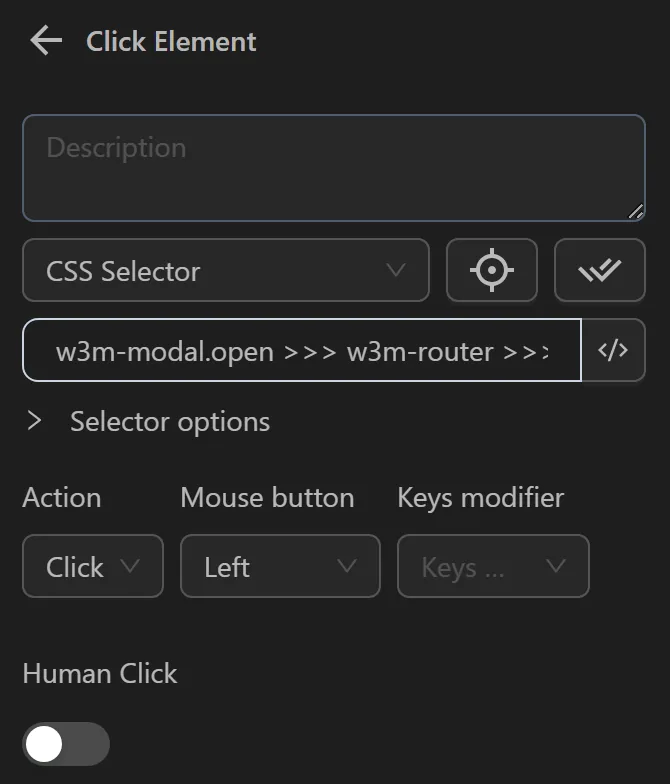
When executed, the node successfully clicks the MetaMask icon to initiate the connection.
XPath
Is a selector, you will use with XPath to identify the element, you want to perform the desired action on. You can refer to documentation to use XPaths in the automation process.
Example of obtaining XPath using Omnilogin's selector
The process involves clicking the Log in button to log into the w3school website after filling in the account information.
To click that button, you need to obtain the XPath of that button.
To obtain that XPath, you can use Omnilogin's selector as follows:
First, create a process and use the Open URL node to open the w3school website.
Next, since you want to click the Login button, you need to use the Click Element node. When configuring the node, you will see a magnifying glass icon as shown. You will click the icon, and, you will automatically be redirected to the active page. If you click the icon but are not redirected, click on the open browser.
Then, you will see the page displayed along with an Omnilogin popup as shown. Since you want to obtain the XPath, you will select XPath.
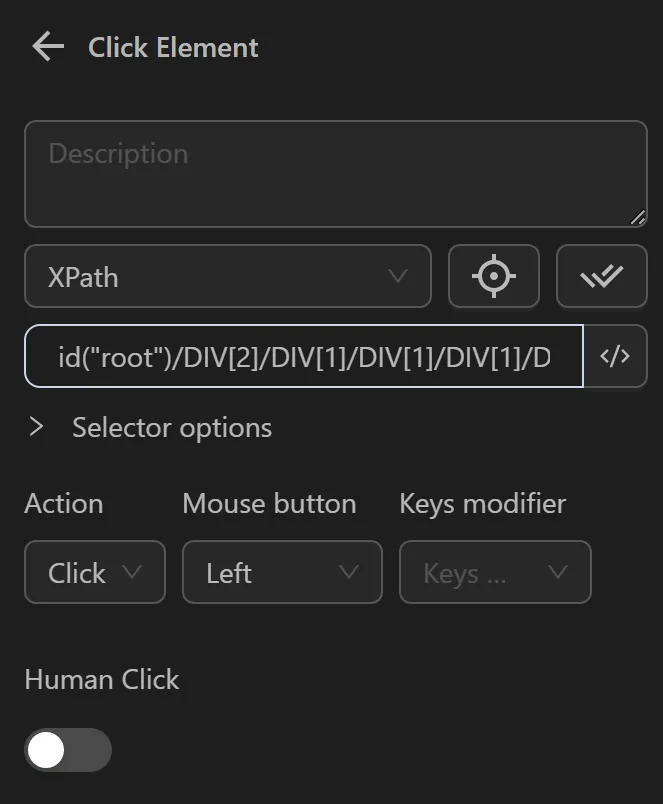
Next, we click the Login button to obtain the selector. At that point, an XPath will be displayed as //button[contains(@class, "CustomButton_button__V5-G+") and contains(@class, "LoginForm_login_button__B4Ksc") and contains(@class, "CustomButton_primary__ZDr5g")].
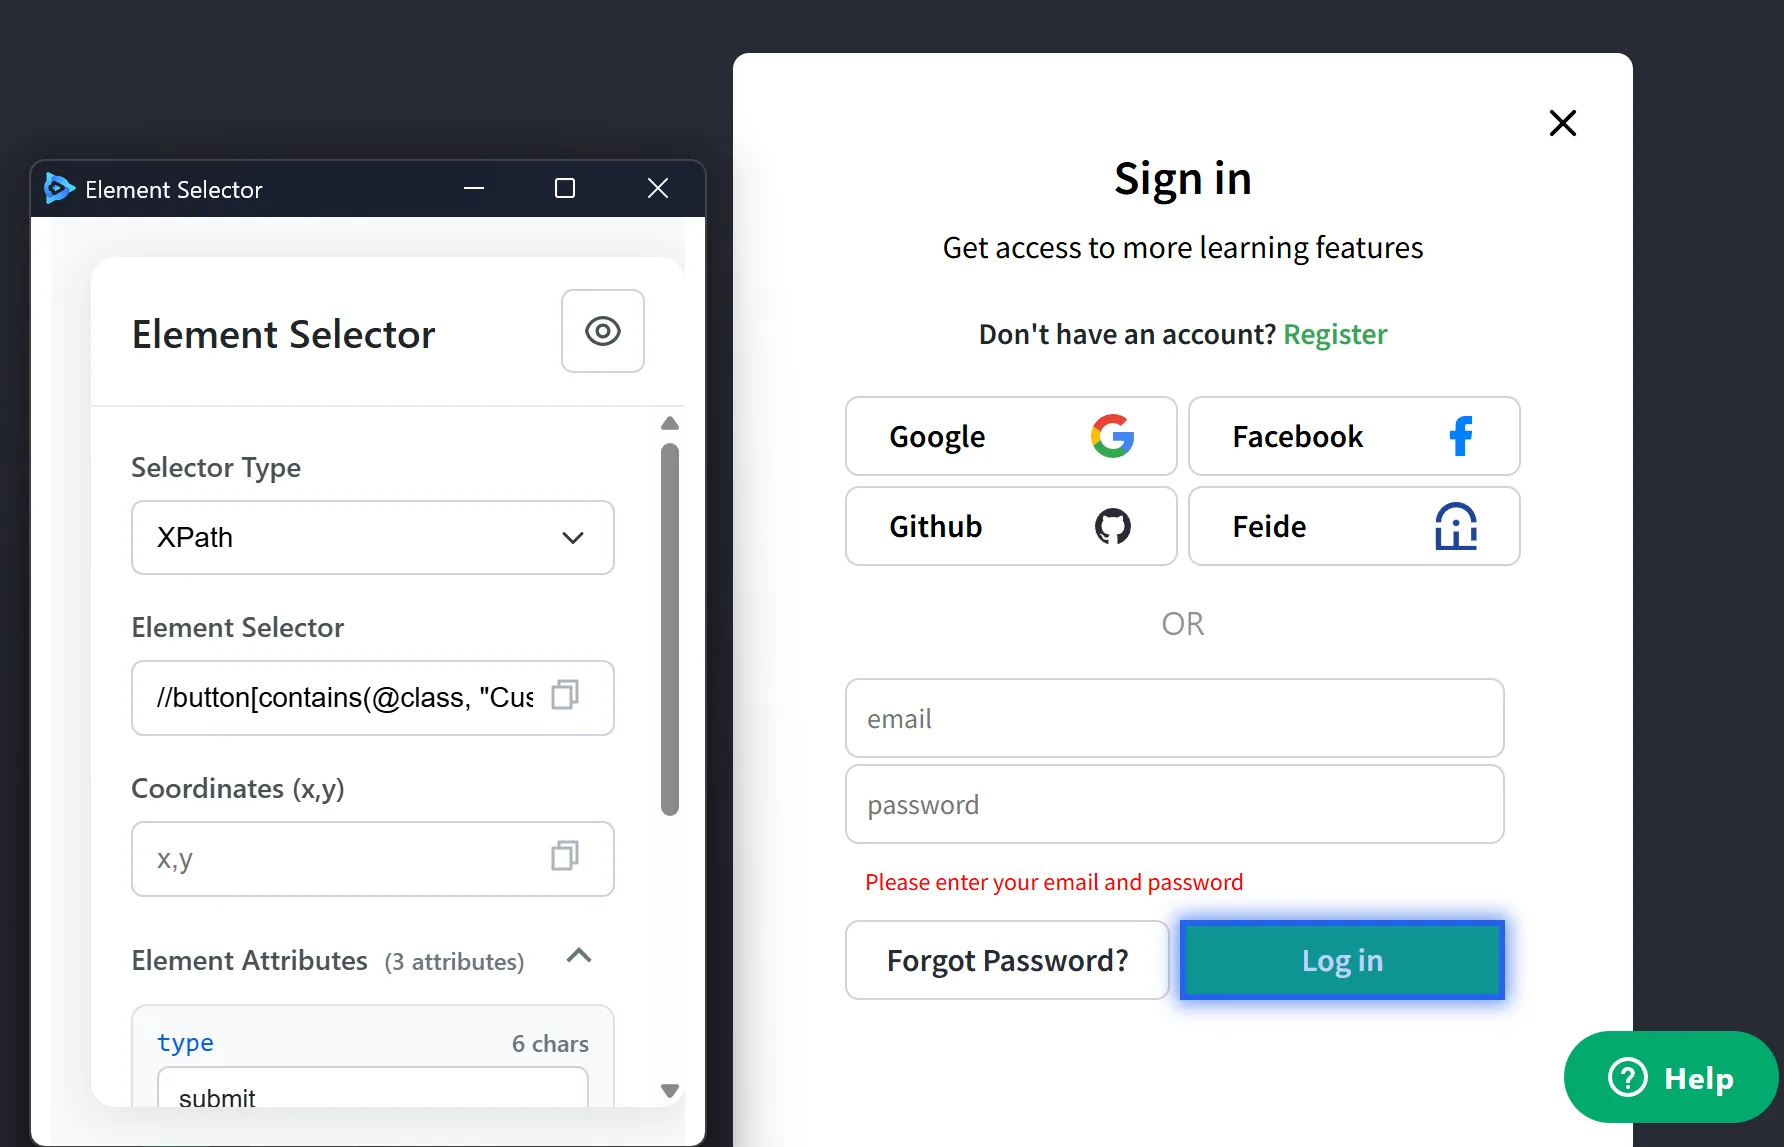
You copy it and enter it into the Click Element node as shown.
Additionally, you can disable selector retrieval by clicking the eye icon.
When running the Click Element node, it will click the Login button.
Example of obtaining XPath manually
The process involves clicking the Log in button to log into the w3school website.
First, create a process and use the Open URL node to open the w3school website.
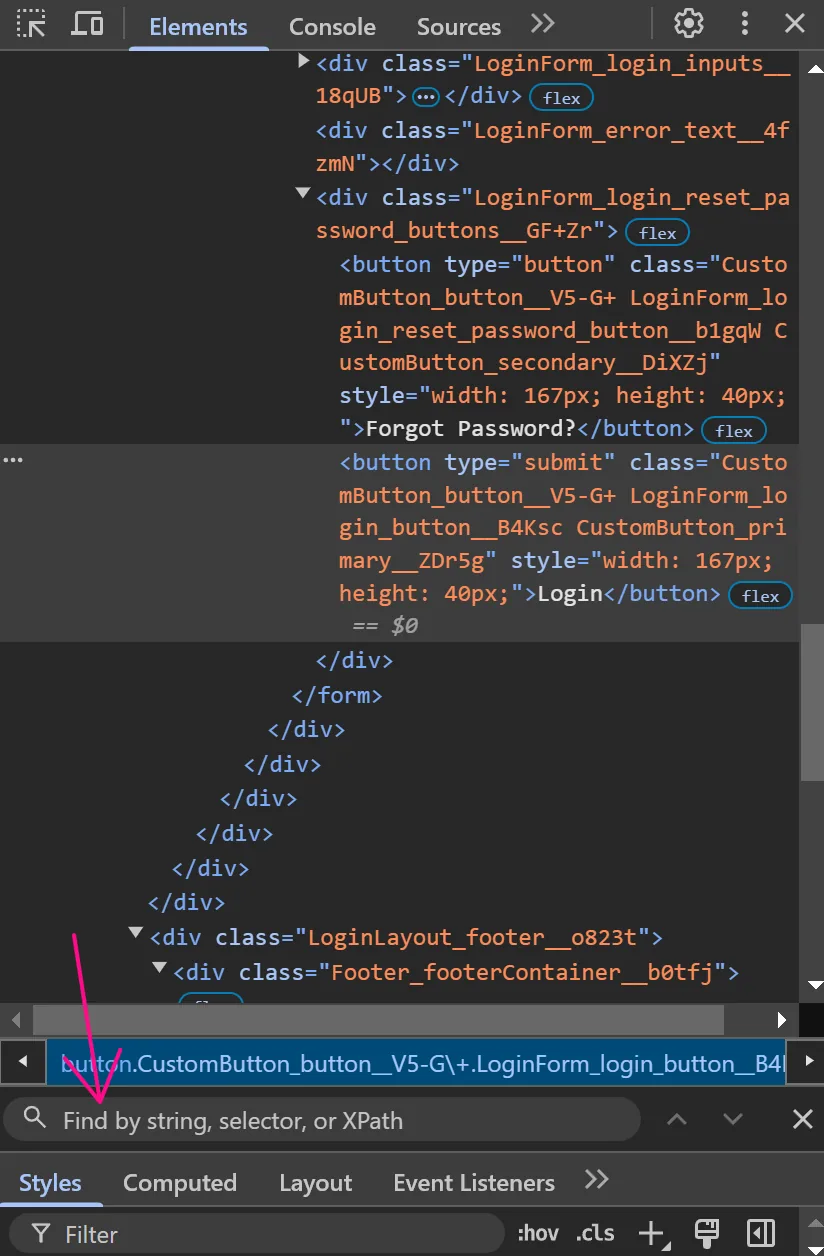
Next, you will press the F12 key or right-click and select Inspect. At that point, a page like the one shown will appear.
Then, you click this arrow.
Next, click the Login button for which you want to obtain the XPath. At that point, the corresponding element for that node will be displayed in the Element section.
After identifying the tag representing the Login buttonyou apply the formula from the documentation: //title[@lang='en'] to write the XPath as: //button[@type="submit"] with title corresponding to button and lang='en' corresponding to type="submit".
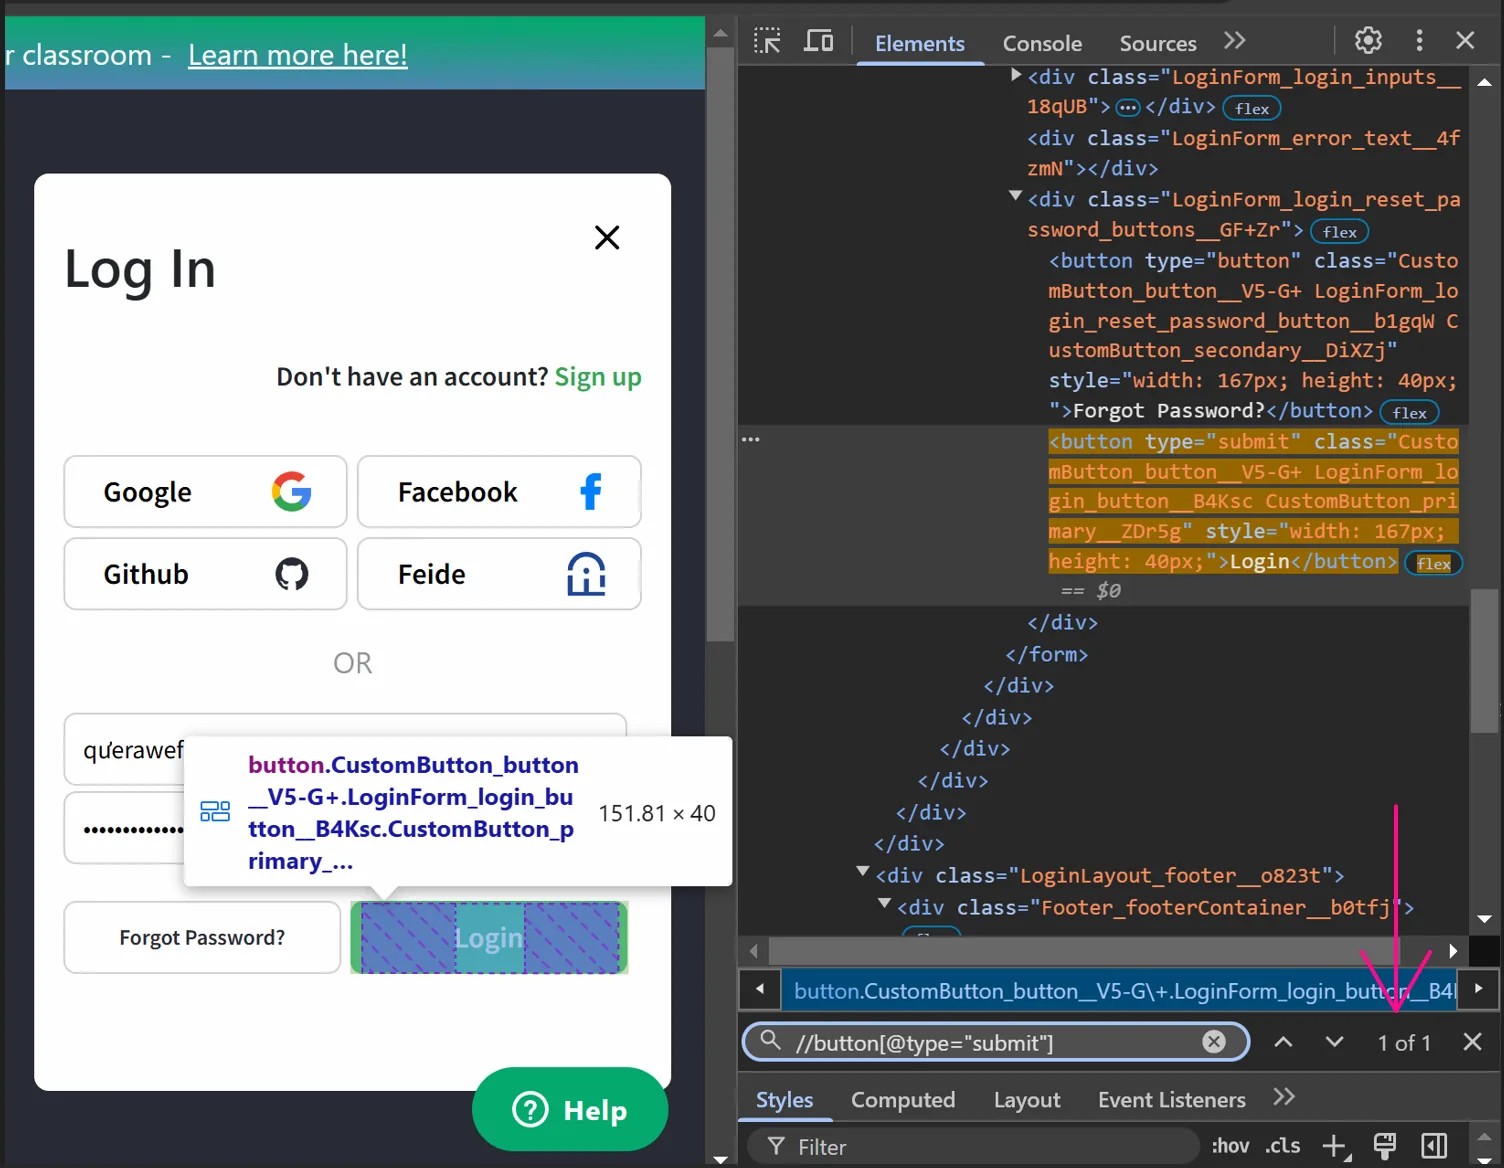
After obtaining it, you can check directly in the Element section by clicking anywhere in the Element area, then using the Ctrl + F key combination. A search bar will appear as follows.
Next, you paste the XPath into that section. When it displays as shown, it means there is only one element corresponding to that XPath, so you can use that XPath.
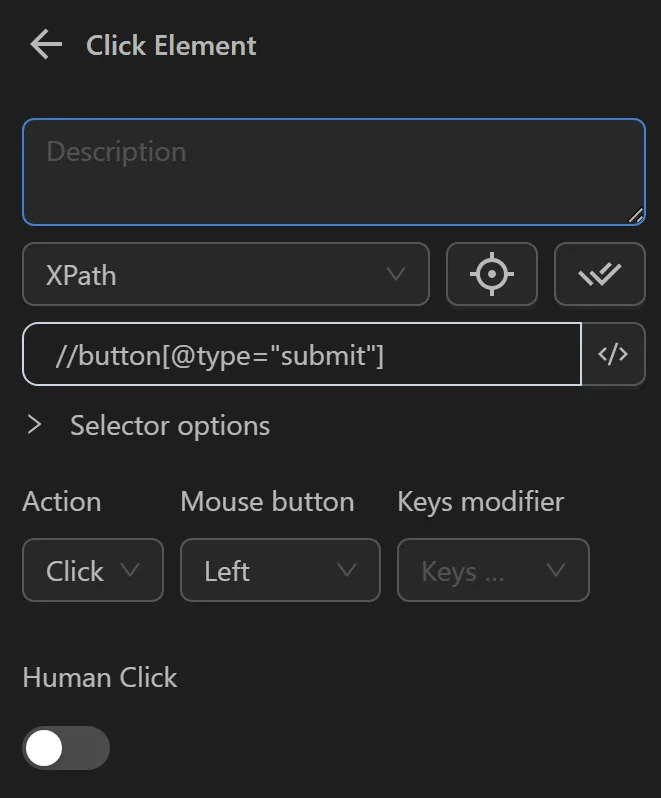
Then, you enter that XPath into the Click Element node.
When running the Click Element node, it will click the Login button.
Coordinates
With a single coordinate
Is an option where you use a coordinate to identify the element, you want to perform the desired action on.
Example of using coordinates in the Click Element node
The process involves clicking the Log in button to log into the w3school website.
To click using coordinates, you need to obtain the coordinates of the Login button. You can use Omnilogin's built-in selector.
First, create a process and use the Open URL node to open the w3school website.
Next, since you want to click the Login button, you need to use the Click Element node. When configuring the node, you will see a magnifying glass icon as shown. You will click the icon, and you will automatically be redirected to the active page. If you click the icon but are not redirected, click on the open browser.
After obtaining the coordinates, you will paste them into the Click Element node.
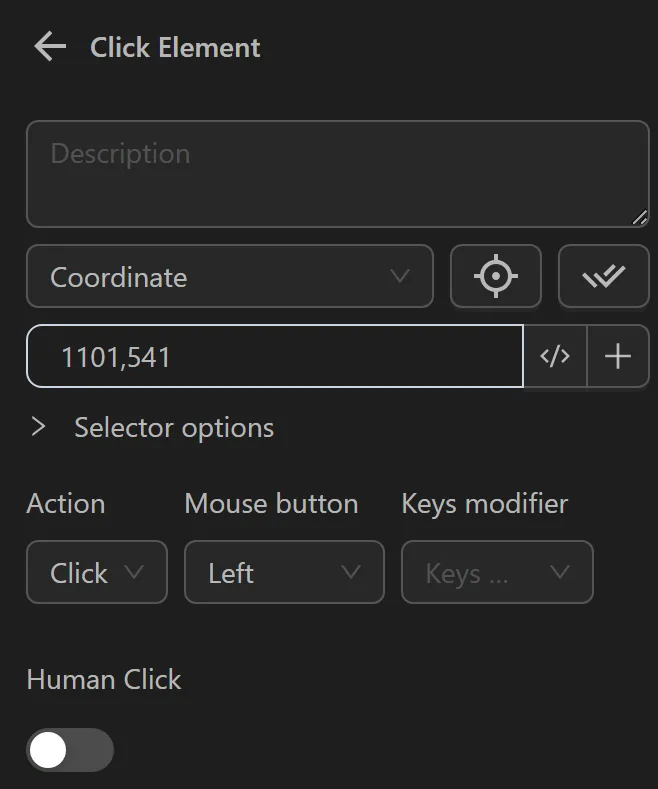
When running the Click Element node, it will click the Login button.
With multiple coordinates
Additionally, you can use multiple coordinates in the mouse click node to perform actions on multiple coordinates within a single Click Element node. The coordinates will be executed from top to bottom.
Example of using multiple coordinates in the Click Element node
The process involves watering multiple soil plots in the Pixels game.
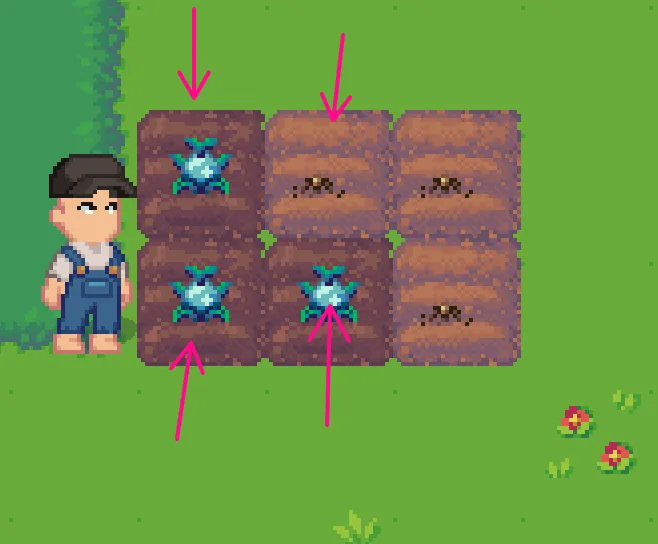
To add multiple coordinates to the node, click the + icon, then enter the coordinate values of the soil plots, you want to water.
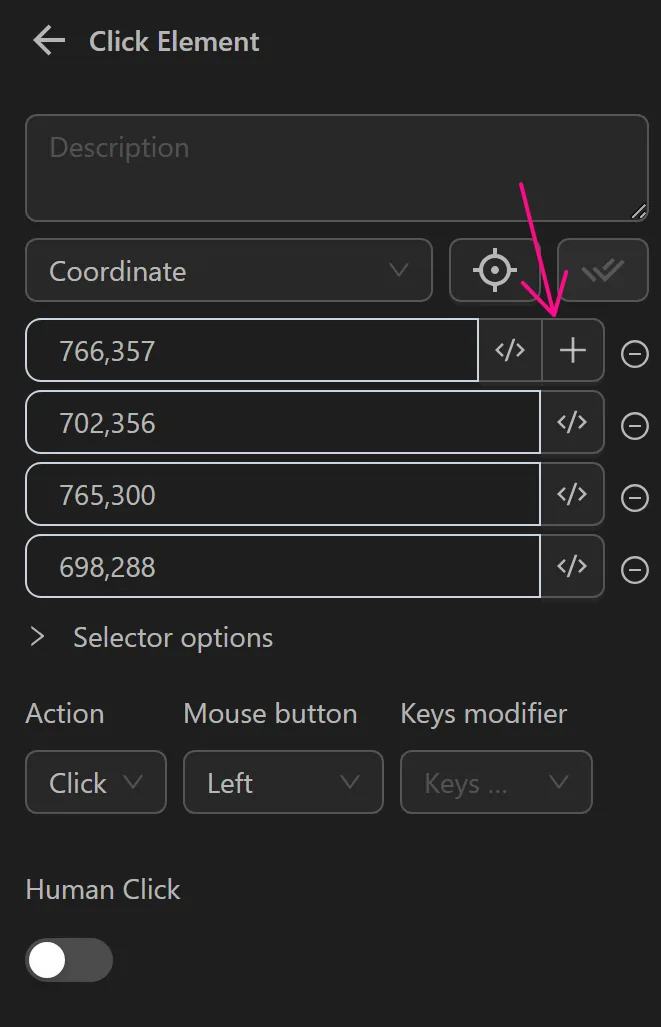
When running the Click Element node, it will click on the soil plots with the corresponding coordinates.
Selector Options
You will find these options when editing any node.
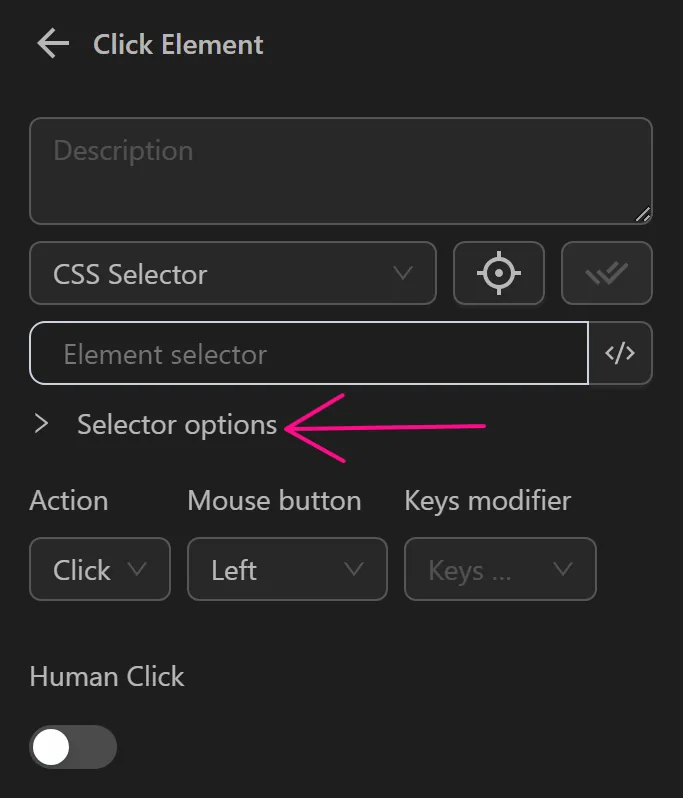
You can also choose customizations based on their functions.
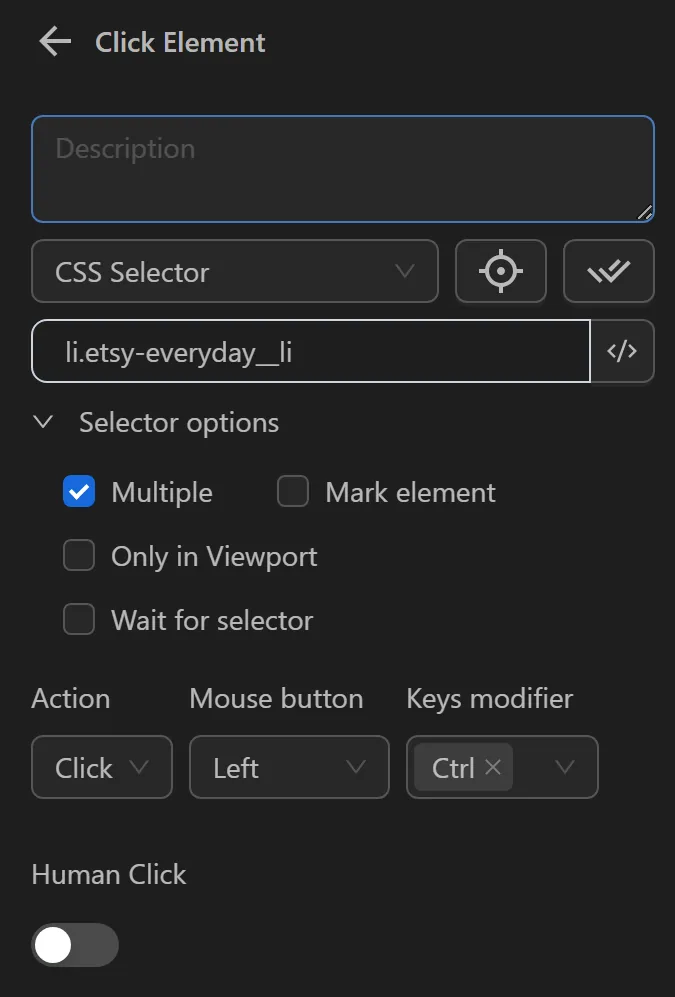
Multiple
Select multiple elements matching the selector. By default, Automation only selects the first element matching the selector. But when you choose this option, that node will perform the action on all elements matching the selector you added.
Example
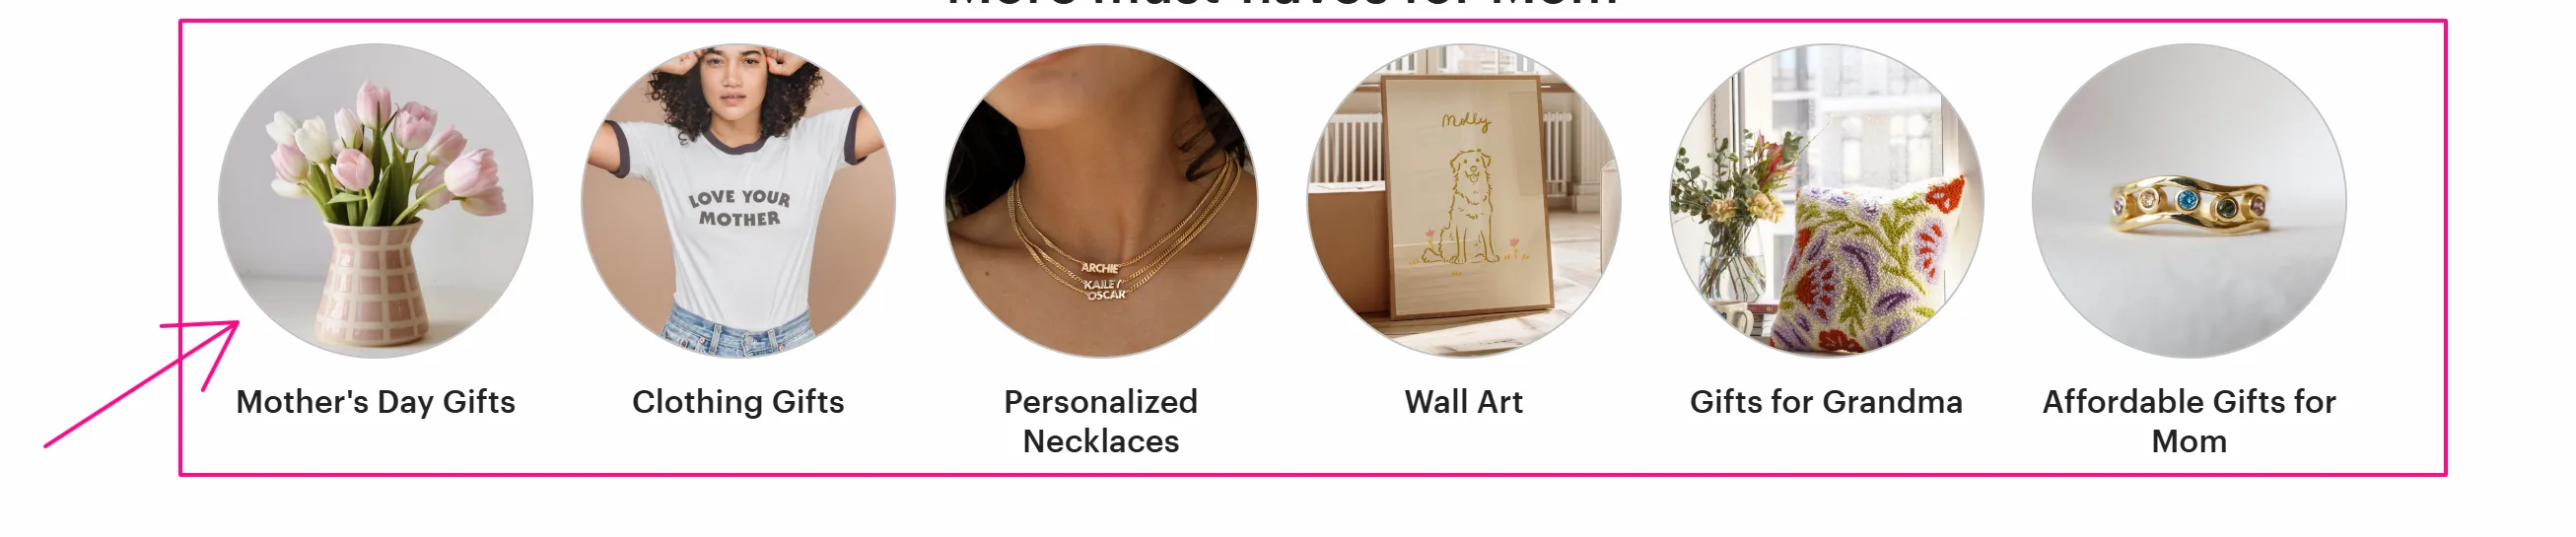
In this example, you want to sequentially click on the list of buttons in this section.
Normally, to iterate through a list of similar elements, you would need to use the Loop Data or Loop Elements node.
However, with the Multiple option, you can use the Click element node to click a list of buttons.
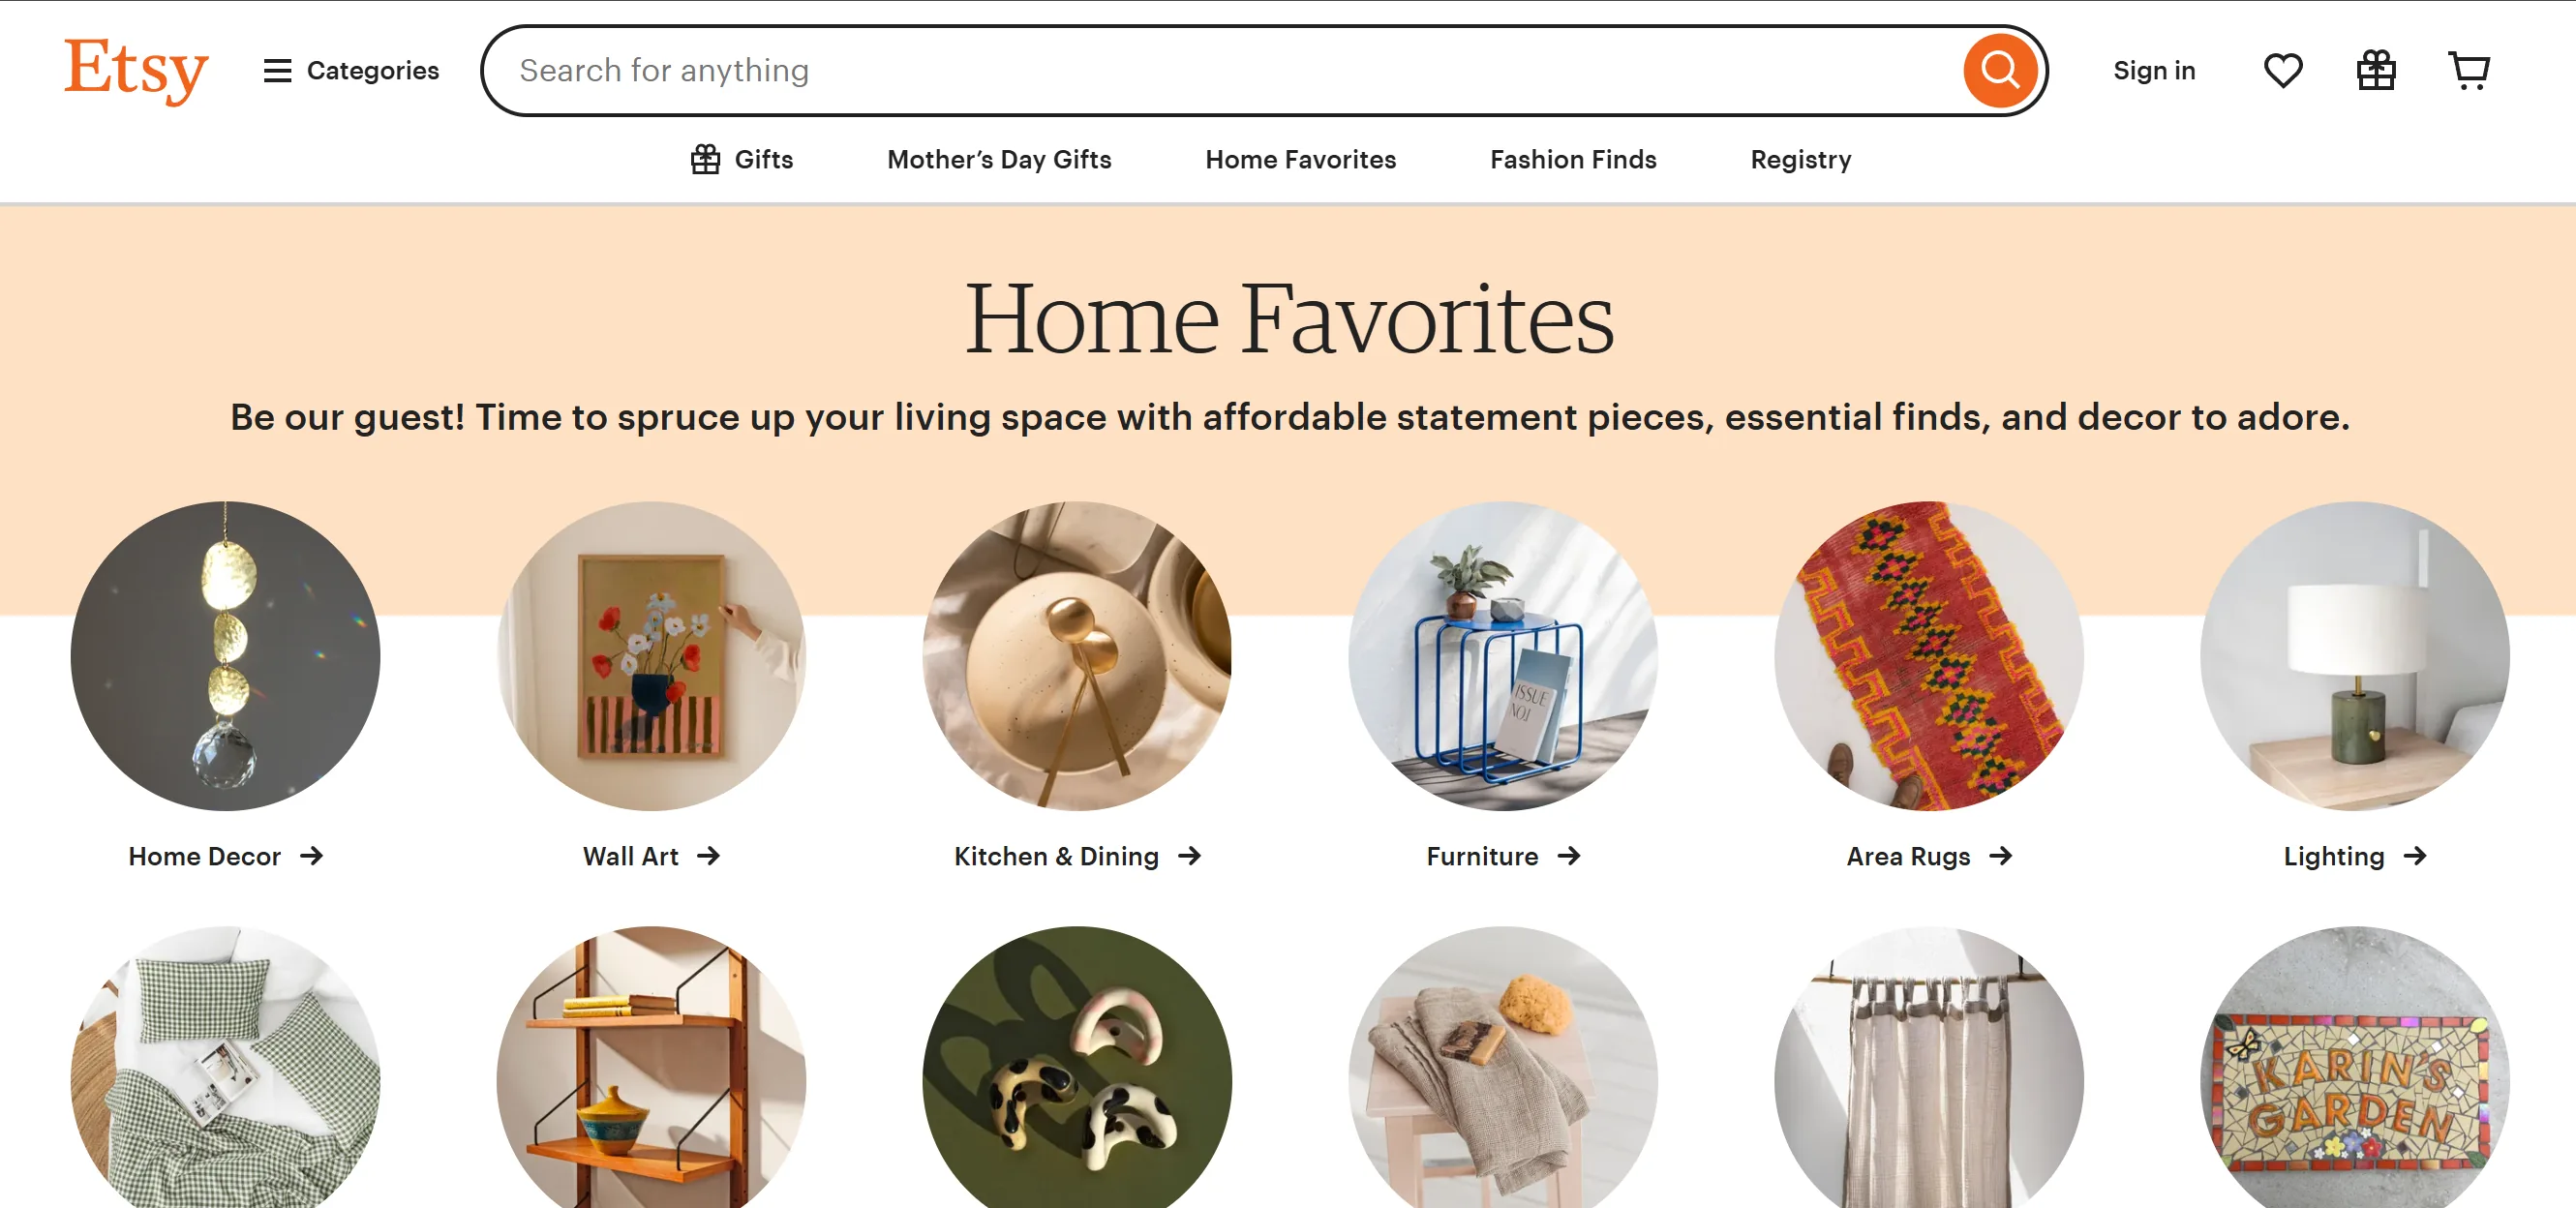
You just need to obtain an Element selector representing all seven buttons. For example, here you use the CSS Selector: li.etsy-everyday__li.
Next, you will use the CSS Selector just obtained in the Click Element node to interact with those buttons.
When running, you will see the Click Element node clicking all the buttons.
Mark Element
Mark the selected element, meaning that element will not be selected if it has already been selected by the same node.
For example, when you have a process like this:
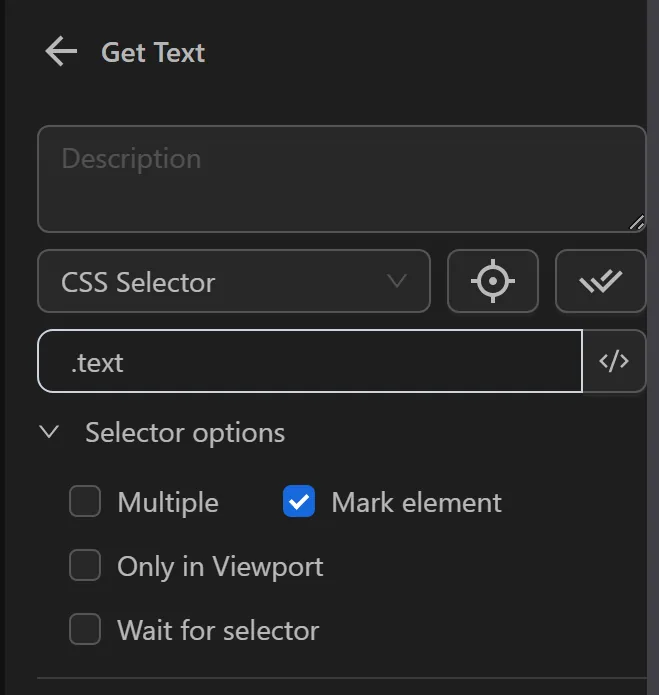
and use node Get Text with the .text selector to select an object, and the website DOM.
<div>
  <p class="text" id="1">Text</p>
  <p class="text" id="2">Text</p>
  <p class="text" id="3">Text</p>
  <p class="text" id="4">Text</p>
</div>
When node Get Text is executed, it will take the first element matching the selector, which is <p class="text" id="1">Text</p>. Since the mark element option is enabled, it will mark the element, and it will look like this: <p class="text" id="1" block--block-id>Text</p>.
<div>
  <p class="text" id="1" block--block-id>Text</p>
  <p class="text" id="2">Text</p>
  <p class="text" id="3">Text</p>
  <p class="text" id="4">Text</p>
</div>
When the node Get Text is executed the second time, it will perform similarly but instead of selecting <p class="text" id="1" block--block-id>Text</p>, it will select <p class="text" id="2">Text</p> because the first element has already been marked.
Only in Viewport
Only interact with elements currently visible on the user's screen.
Example
Below, when you want to click the Download the Etsy App button at the bottom of the page.
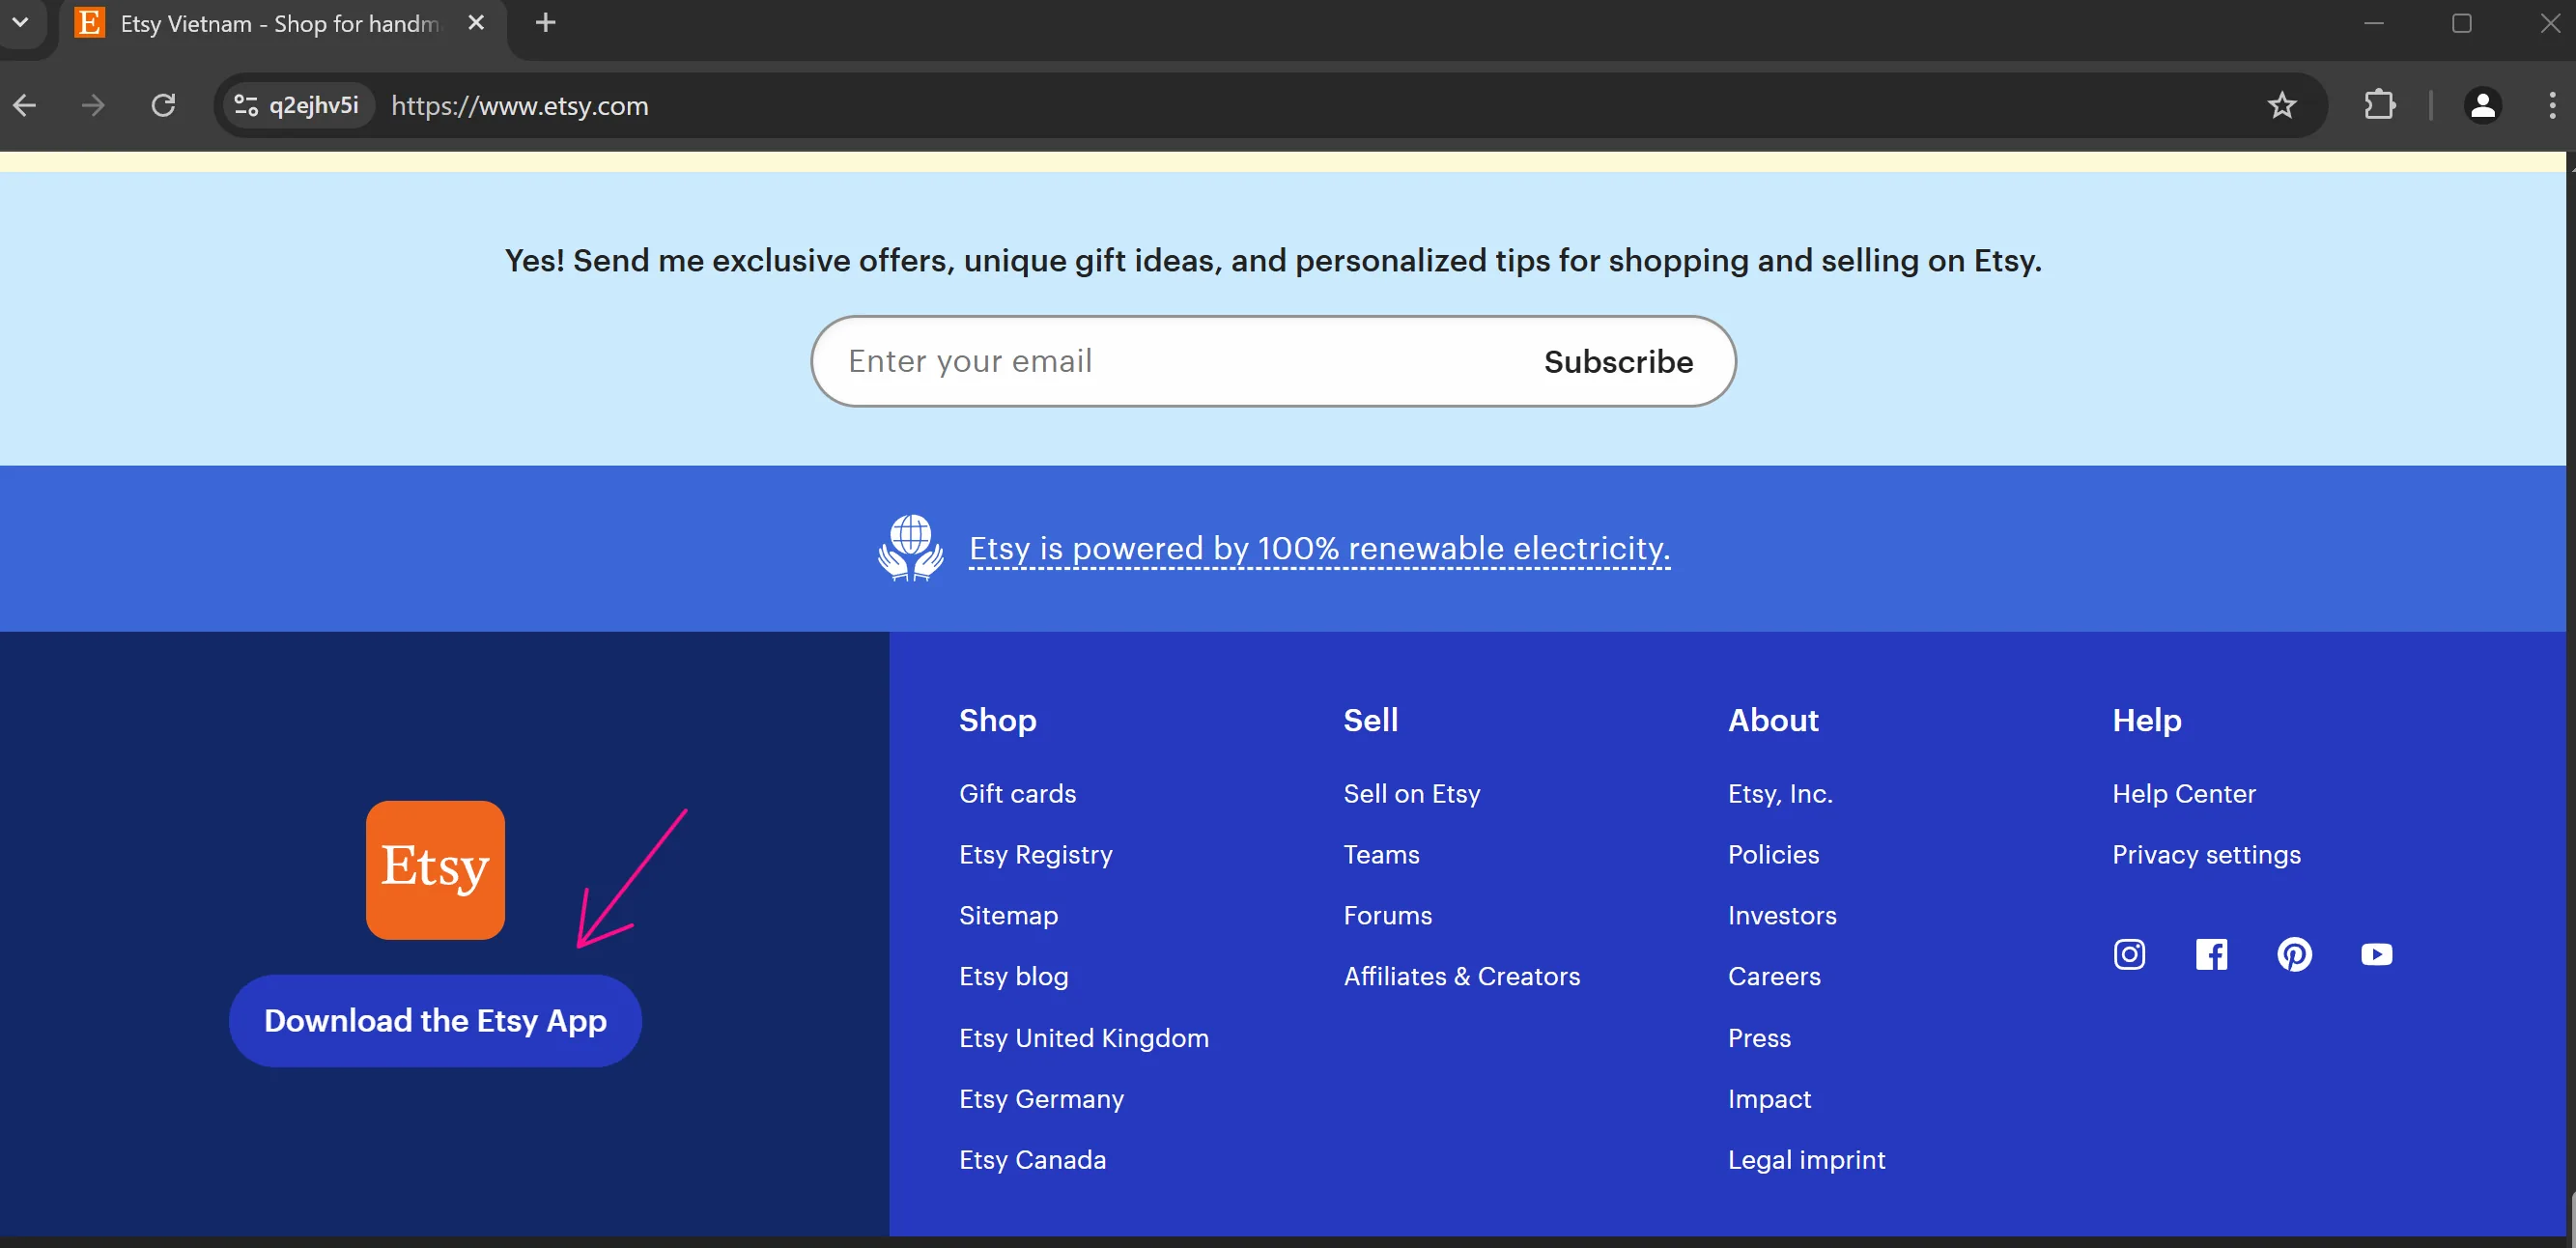
Normally, you can perform the click action.

But if you choose the Select Only on Screen option, you cannot perform the click.
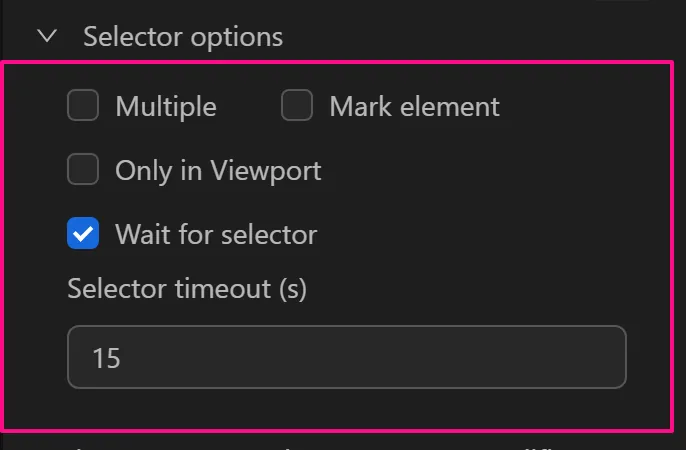
Wait for Selector
Wait until the selector appears on the website. If the selector is already present at the time of checking, the node is executed immediately. If the selector does not appear after the specified wait time in the wait time field, the process will report an error in the logs.
Example when the element exists
Below, when you want to click this product on the Etsy website.
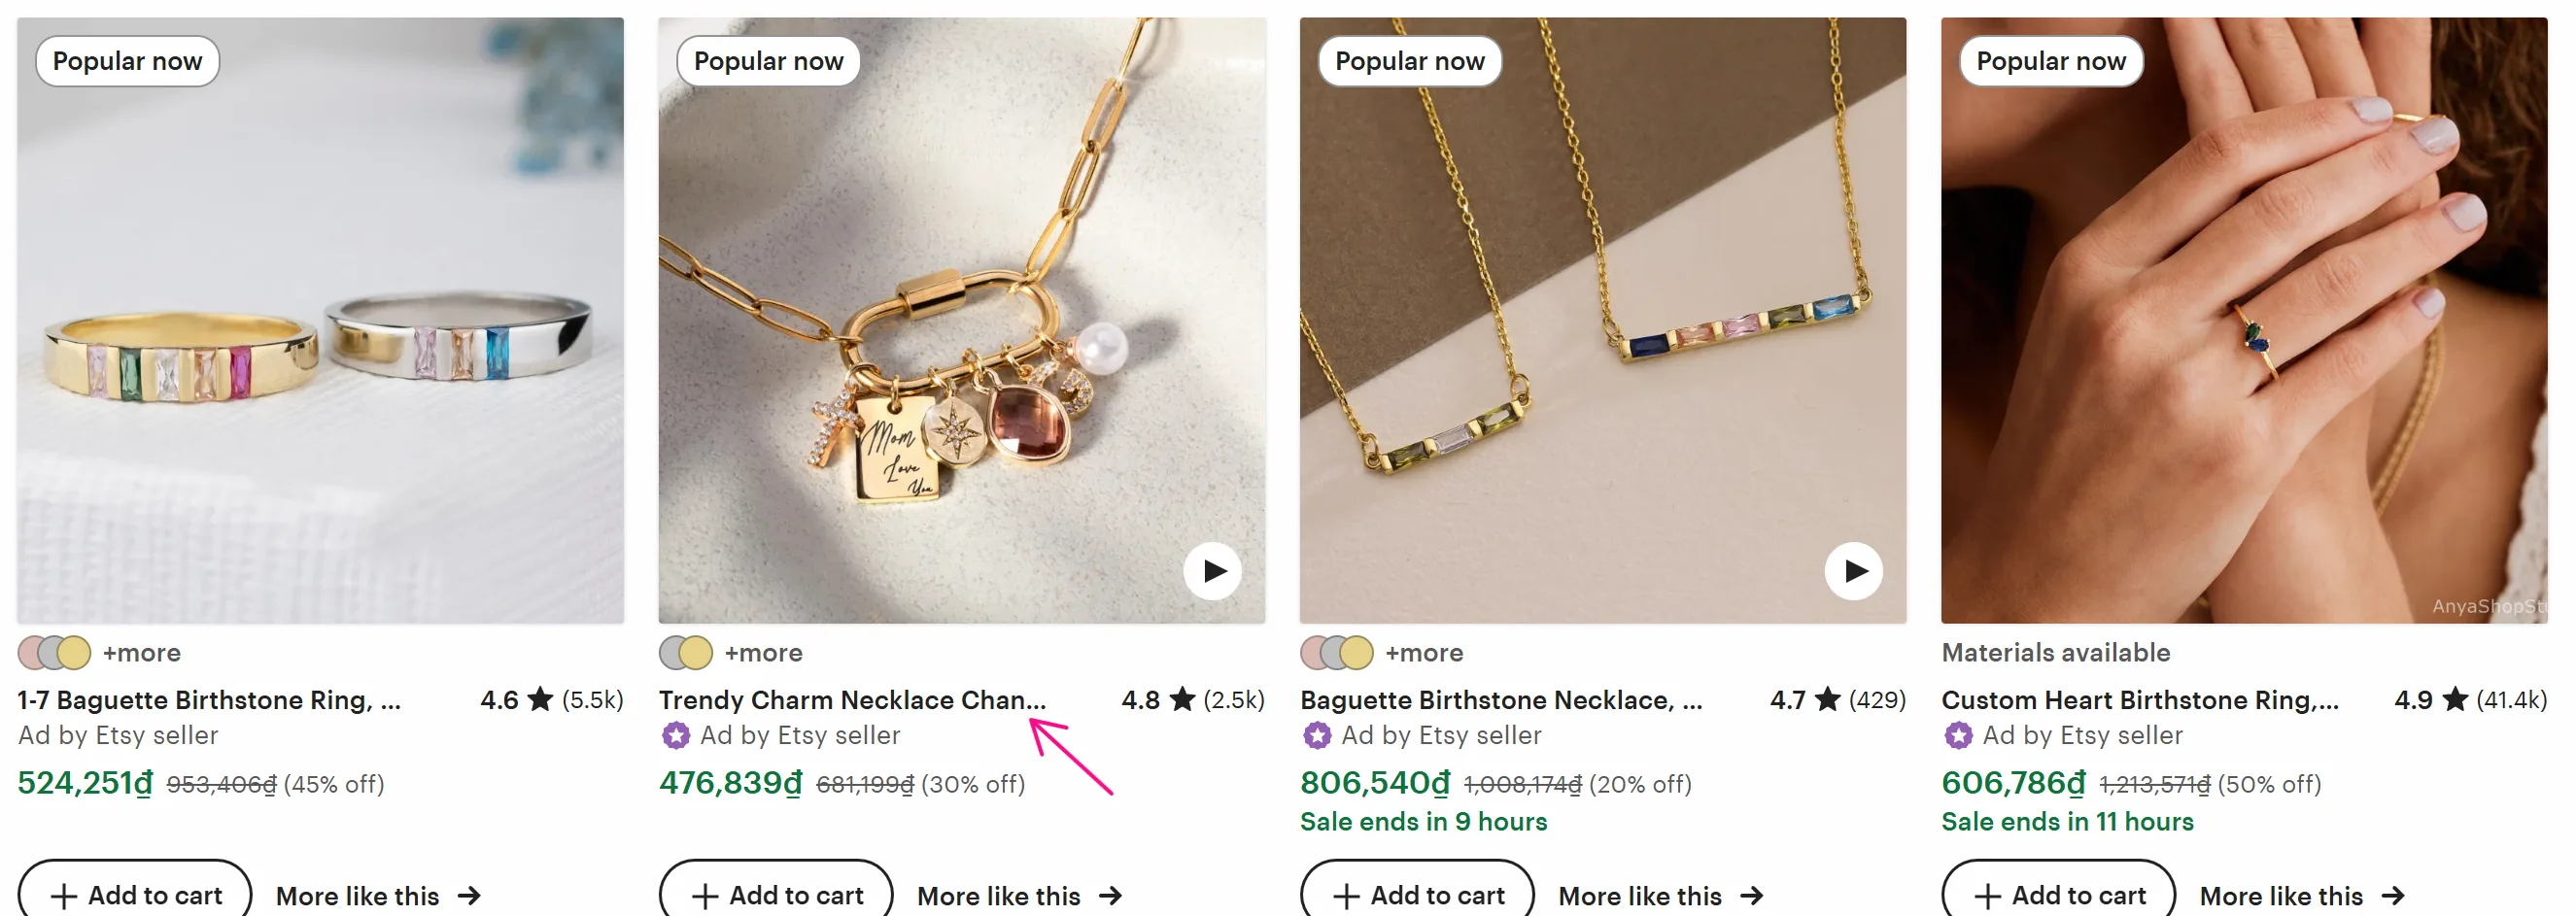
To interact with that element, you obtained the selector: [title="Trendy Charm Necklace Changeable Gold Charm Personalized Jewelry Unique Gift for Her Mother's Day Gift New Mom Gift"] and verified that the selector matches that product element.
Then, you will use it in the Click Element node to click that product with a wait time configuration of 5 seconds.
As you can see, the element exists, so you was able to interact with it.
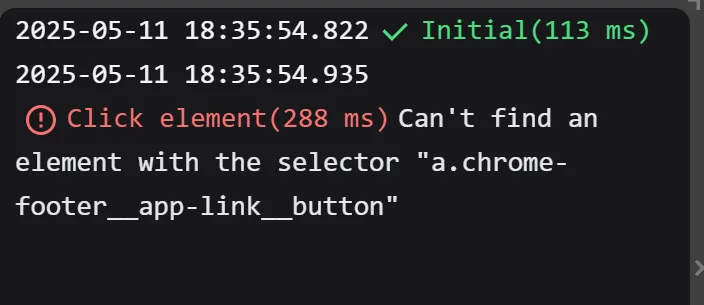
Example when the element does not exist
In this example, you will interact with this new page.
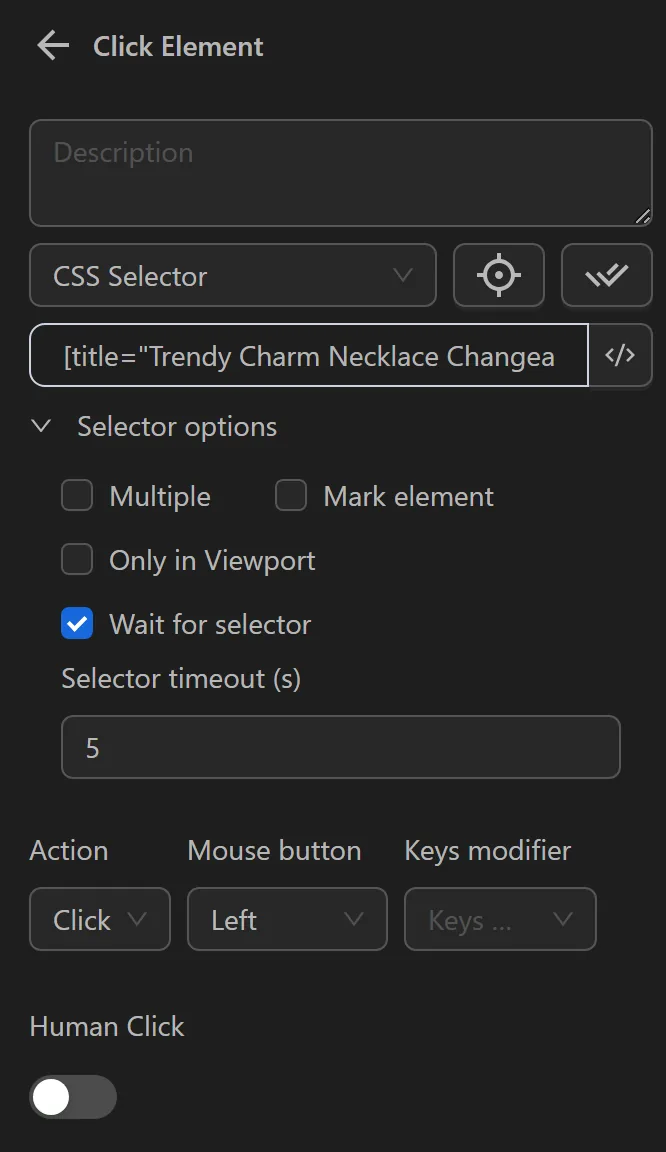
But you will still use the old CSS Selector, so the Click Element node will surely fail. Here you will configure the Wait for selector to wait 5 seconds before returning an error with the following configuration.
Then, when running the Click Element node you will see that since the element is not found, it will return error information after two seconds.
Note
You need to open the browser on the page where you want to find the element selector. When you click the icon, you will automatically be redirected to the active page. If you click the icon but are not redirected, click on the open browser.
Customizing Selectors
Automation supports standard selectors like CSS Selector, XPath expressions, and Coordinates.