Attribute Value Block
The Attribute Value block extracts the value of a specified attribute from an HTML element. Use it to retrieve data like href links, src paths, value contents, or any other DOM attribute.
Element Selector
Select the element and enter it using the element selector.
Selector Options
Choose the desired options.
Attribute Name
The name of the attribute to retrieve.
Assign to Variable
You can assign the value to a variable.
- Variable Name: The name of the variable to assign the value to. This field appears when you choose to assign to a variable.
Insert into Table
You can insert the value into a column in a table.
- Select Column: The column where the value will be inserted. This field appears when you choose to insert into a table.
Add Additional Row
Insert an additional row into a column in the table.
Practical Examples
Extracting Attribute Containing an Element's Link
Example
If you want to extract all links from a list of elements and export them to a file for use, you can proceed as follows:
Here, you want to extract the links from the elements in the Discover gifts for every occasion section.

To extract all the links, you can create multiple Attribute value nodes to retrieve the href attribute values for each corresponding element.

However, this approach is not efficient when there are many elements, as you would need to create multiple Attribute value nodes. To extract links from any number of elements, you can follow these steps:
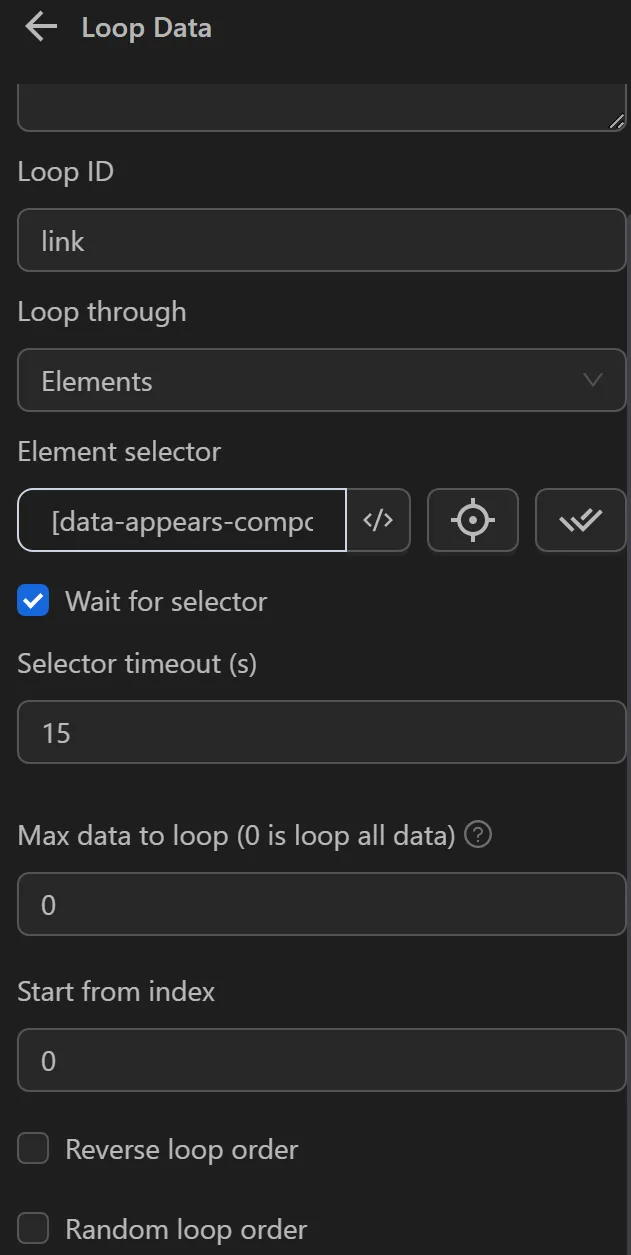
First, obtain the common selector for these elements. You have identified the selector [data-appears-component-name="Homepage_Vesta_ApiSpec_ContentfulSearchBubbles"] a, and when you check, moving to the element corresponding to the selector at the third position shows in Chrome DevTools that it is the third item in a list of six elements with the same selector.

Next, use this selector in the Loop Data node and configure it as follows:
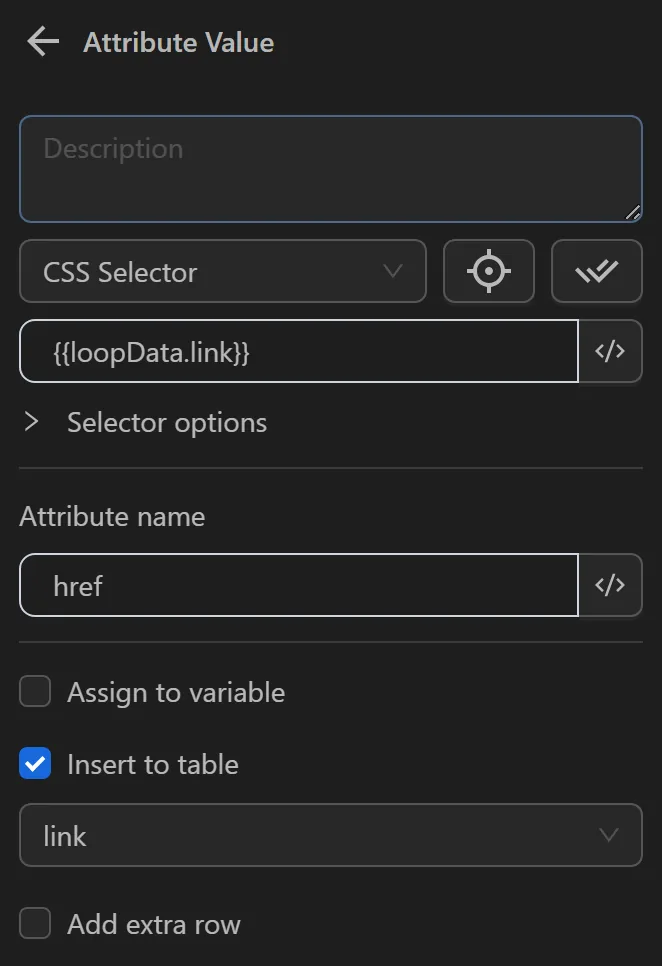
Configure the Attribute value node to use the expression loopData.loopId for each element iterated by the Loop Data node, instead of directly specifying the selector in the CSS Selector field. Here, loopId is link, so you use the formula loopData.link. Since you want to extract the value of the href attribute from the element, you enter href into the node. To export the links to a file, you first insert them into a column. Here, A column named 'Links' has been created in advance, and the node is configured to insert data into this column.
Next, configure the Stop Loop node. Once all elements are iterated, the workflow will proceed to the nodes connected to this Stop Loop node.
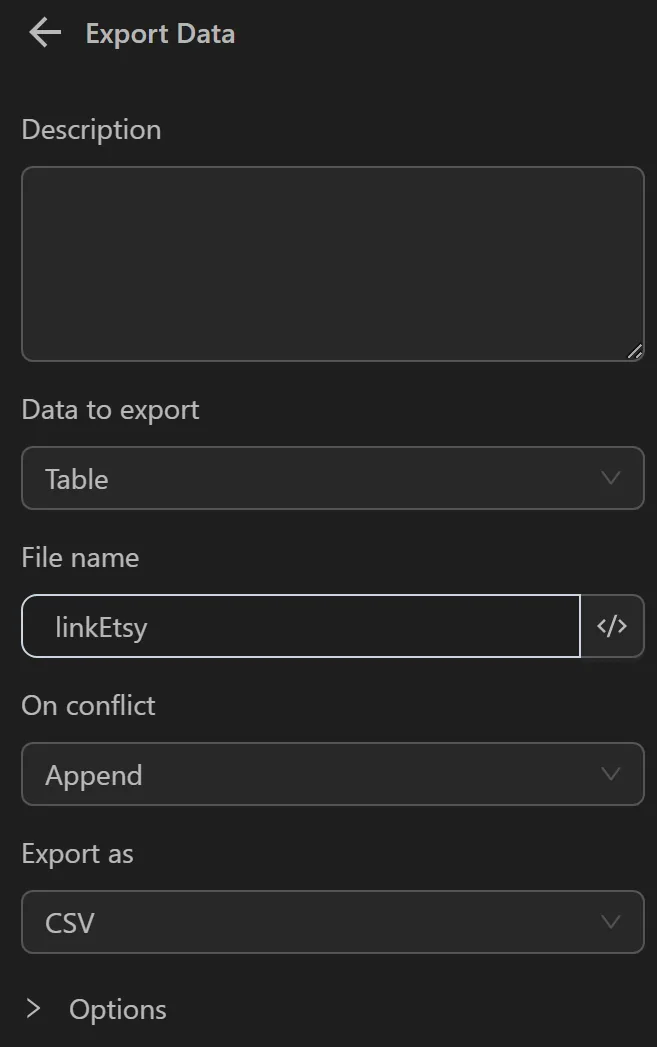
Finally, to export to a file, you use the Export Data node and configure it as follows:
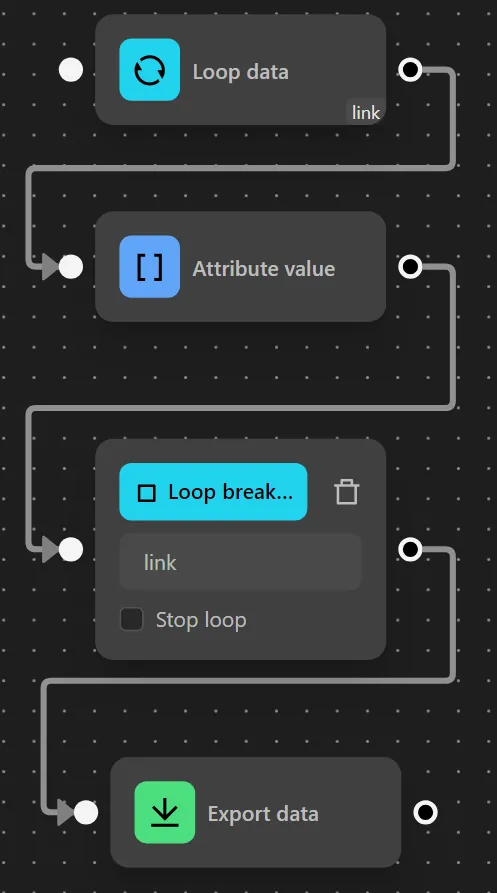
The nodes are connected as follows:
When running the workflow, you obtain a file containing the links as follows:

Extracting Attribute Containing an Element's Value
Example
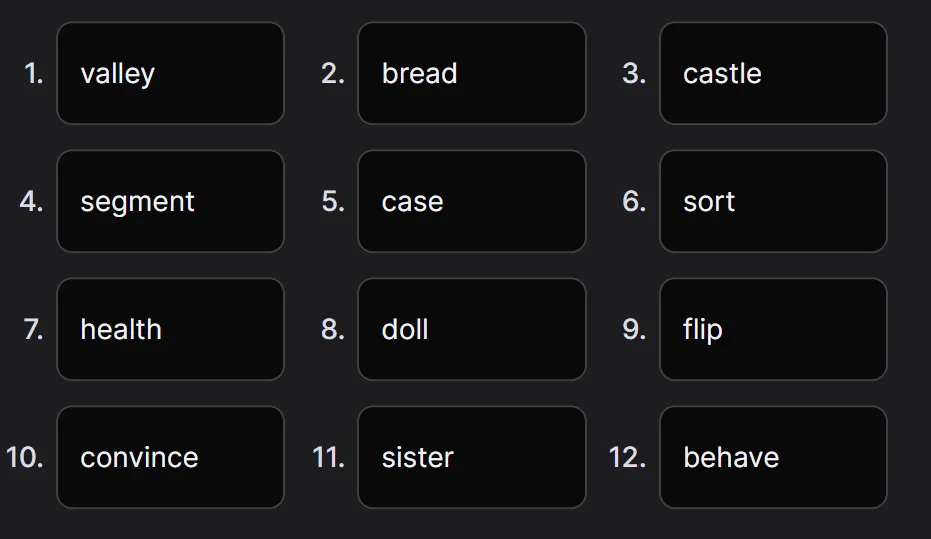
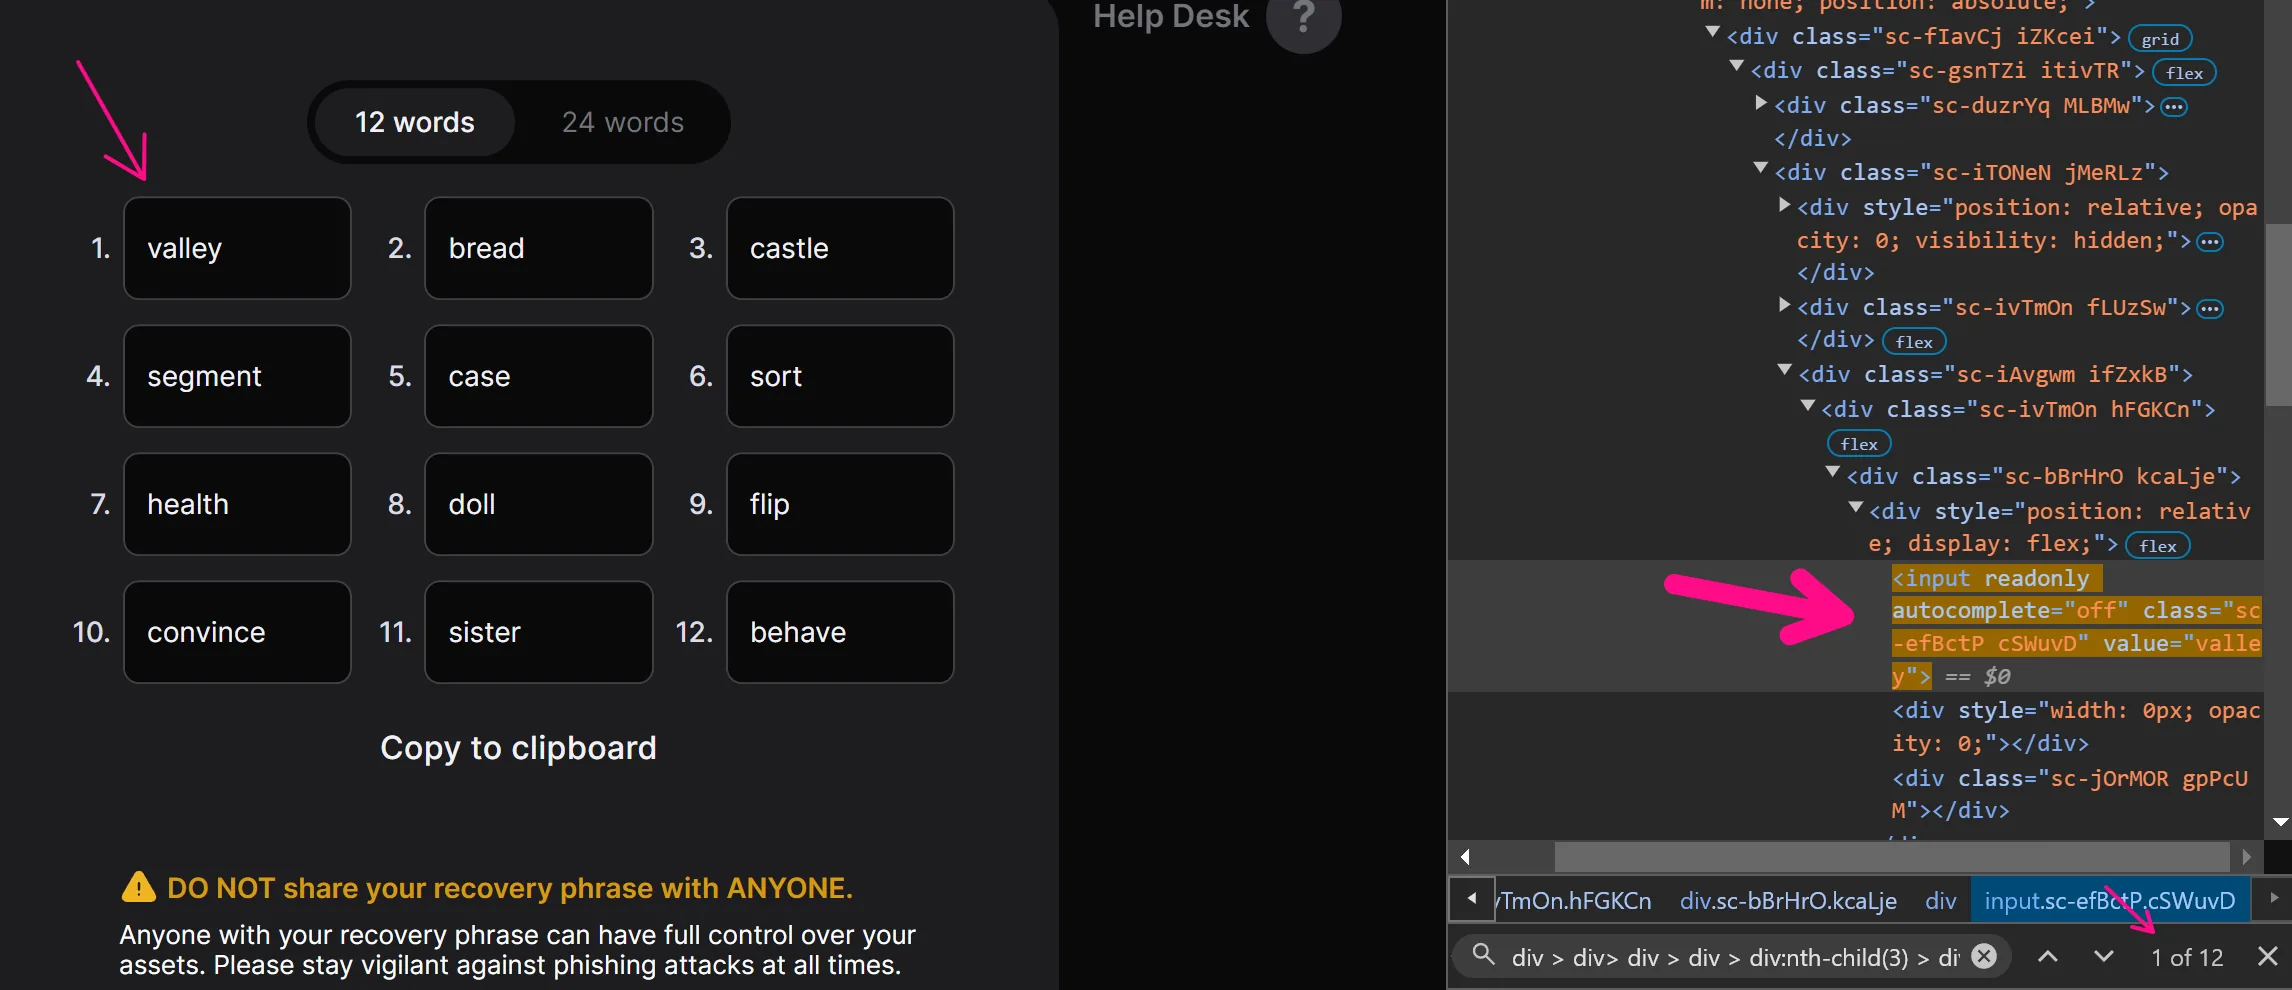
Here, you want to extract the list of keywords when creating a Keplr wallet and then export them to a file.
To extract all the keywords, you could create multiple Attribute value nodes to retrieve the values of the value attribute for each element corresponding to the keyword it contains.

However, this approach is not efficient when there are many elements, as you would need to create multiple Attribute value nodes. To extract keywords from any number of elements, you can follow these steps:
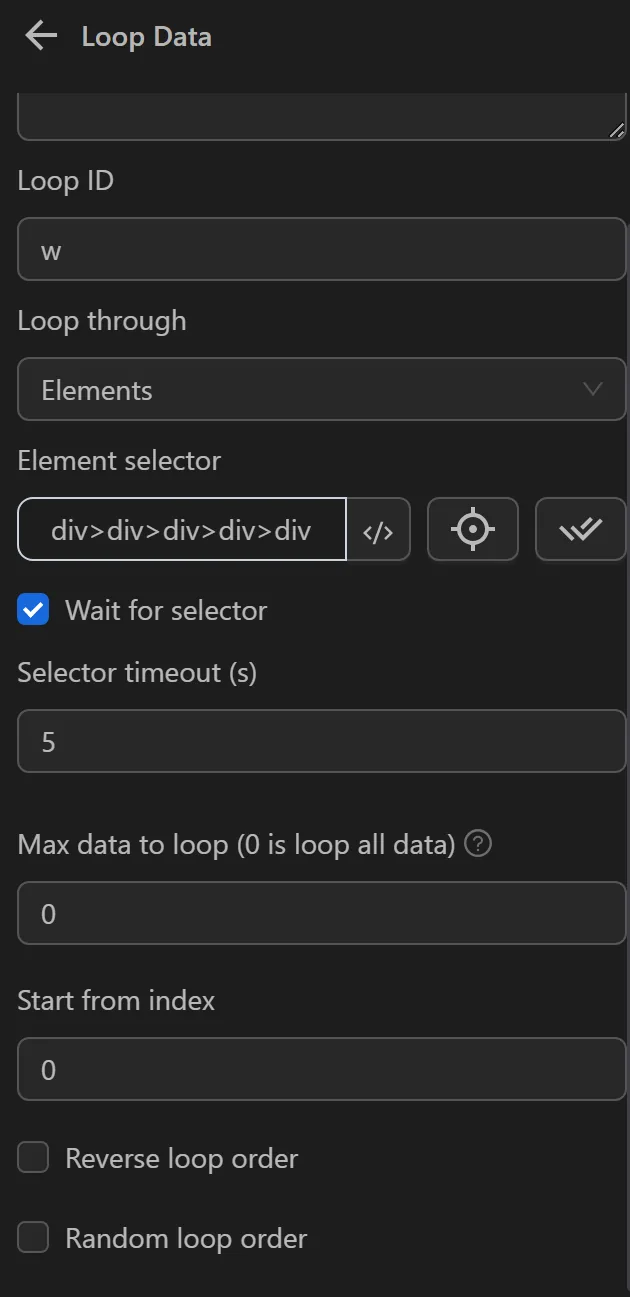
First, obtain the common selector for these elements. You have identified the selector div > div> div > div > div:nth-child(3) > div > div > div> div> div > div > div>div>div:nth-child(2) input, and when you check, moving to the element corresponding to the selector at the first position shows in Chrome DevTools that it is the first item in the list of elements with the same selector.
Next, use this selector in the Loop Data node and configure it as follows:
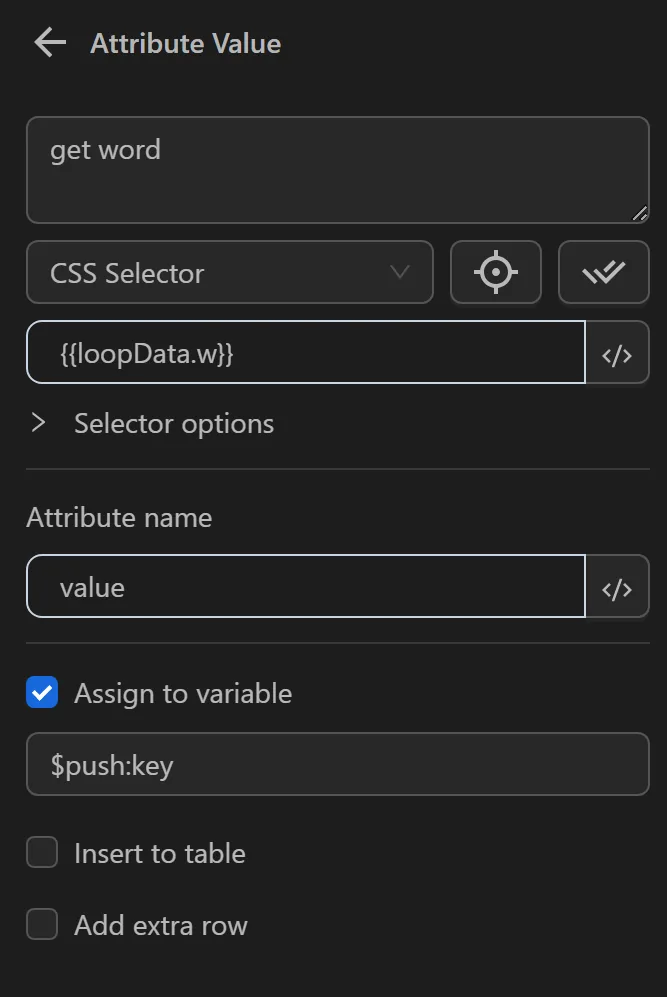
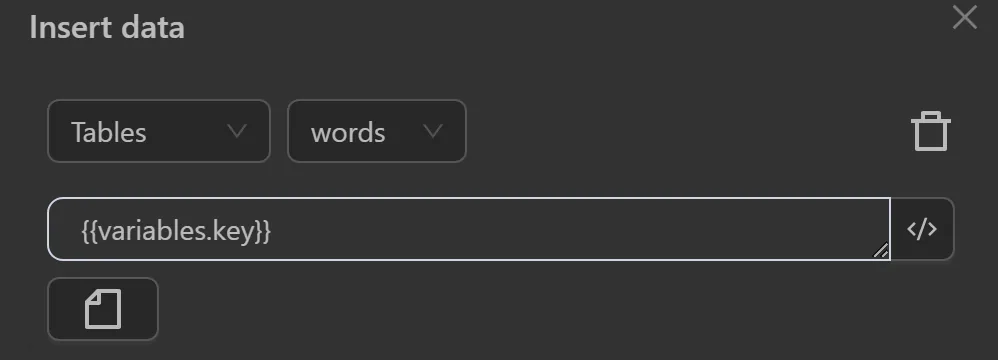
Configure the Attribute value node to use the expression loopData.loopId for each element iterated by the Loop Data node, instead of directly specifying the selector in the CSS Selector field. Here, loopId is w, so you use the formula loopData.w. Since you want to extract the value of the value attribute from the element, you enter value into the node. To export all the extracted keywords to a file, you first insert all keywords into a variable key as an array.
Then, use the Insert Data node to insert the values of the variable into a pre-created column words and configure the node to insert data into the words column in the table.
Next, configure the Stop Loop node. Once all elements are iterated, the workflow will proceed to the nodes connected to this Stop Loop node.
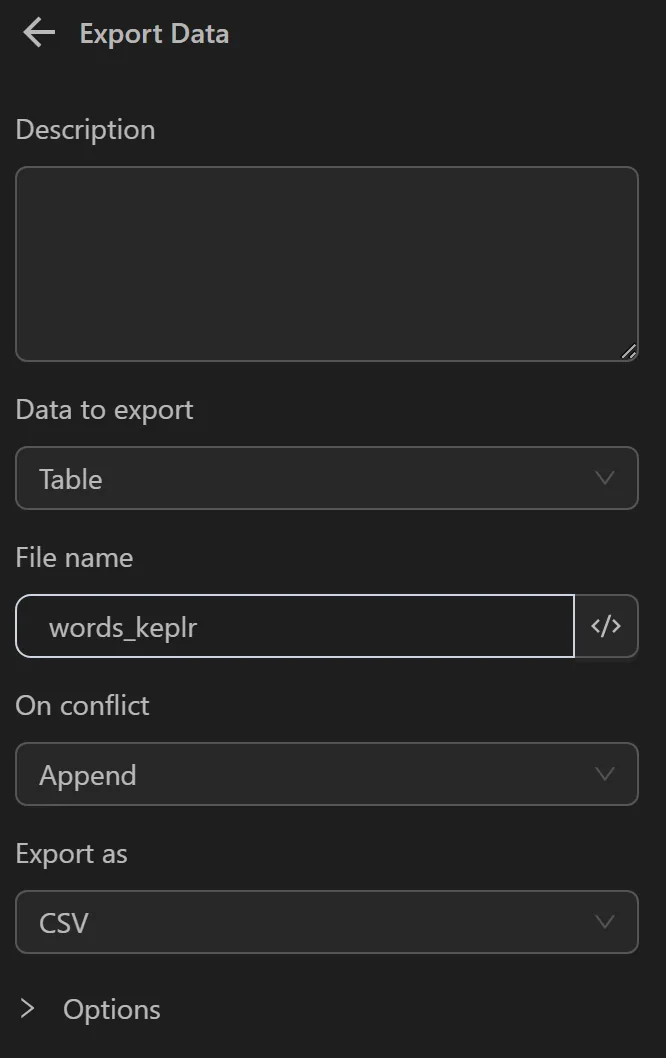
Finally, to export to a file, you use the Export Data node and configure it as follows:
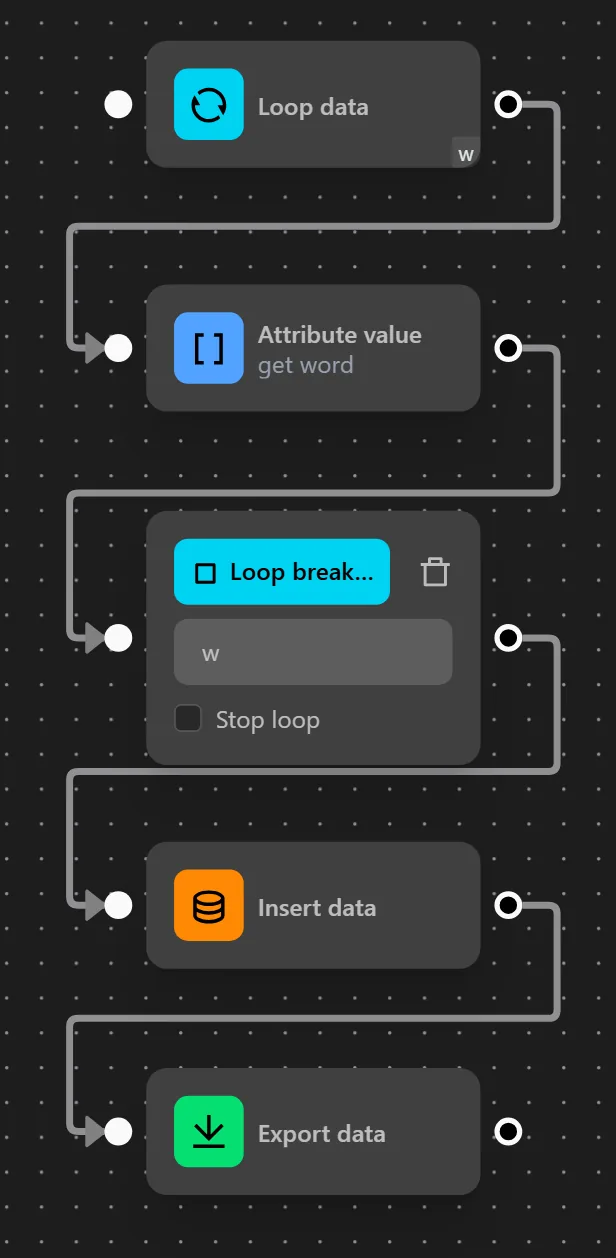
The nodes are connected as follows:
When running the workflow, you obtain a file containing the links as follows:
