Variables
Variables store values that you can access and update throughout your workflow. To assign a value to a variable, simply specify its name in any block that supports variable assignment.
Variable Name
You can name your variable whatever you like. However, to make accessing variables easier, avoid using spaces, characters like (@), and square brackets ([]) in variable names.
Insert Data into a Variable
Insert Data into a Regular Variable
Normally, when a variable receives a new value, it overwrites the existing one.
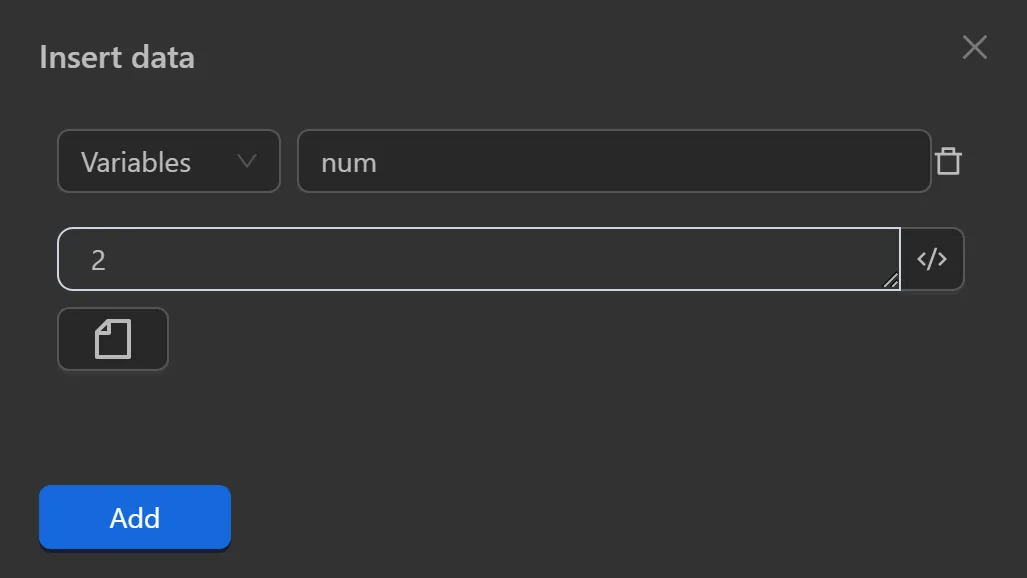
Example of assigning a value to a variable normally
For example, here you will insert the value 1 into a variable named num, configure the Insert Data node as follows:
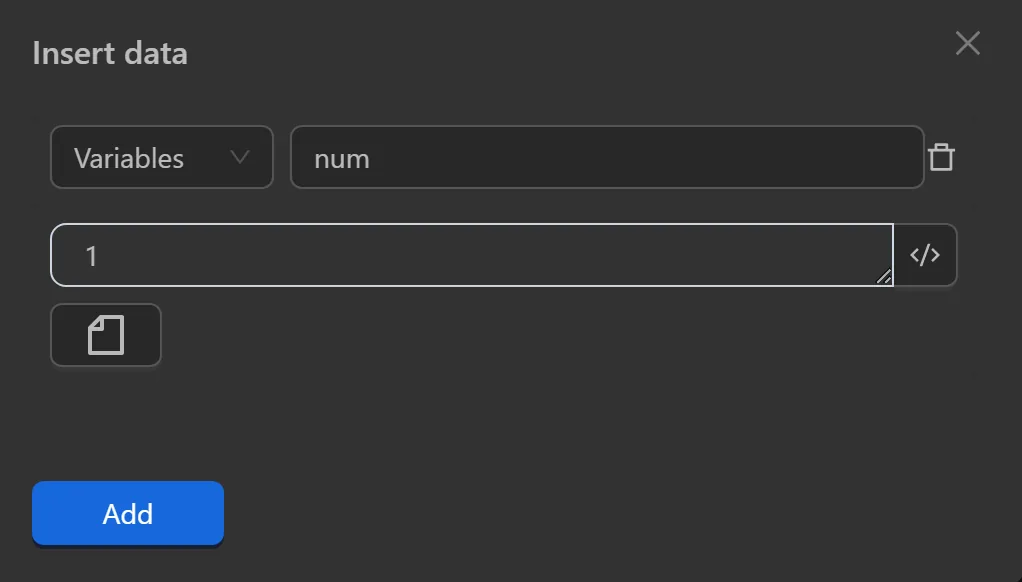
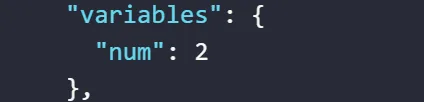
After running this node, you will see the variable num holds the value 1.

If you want to assign a new value 2 to replace the value 1, configure it as follows:
Insert Data into an Array-Type Variable
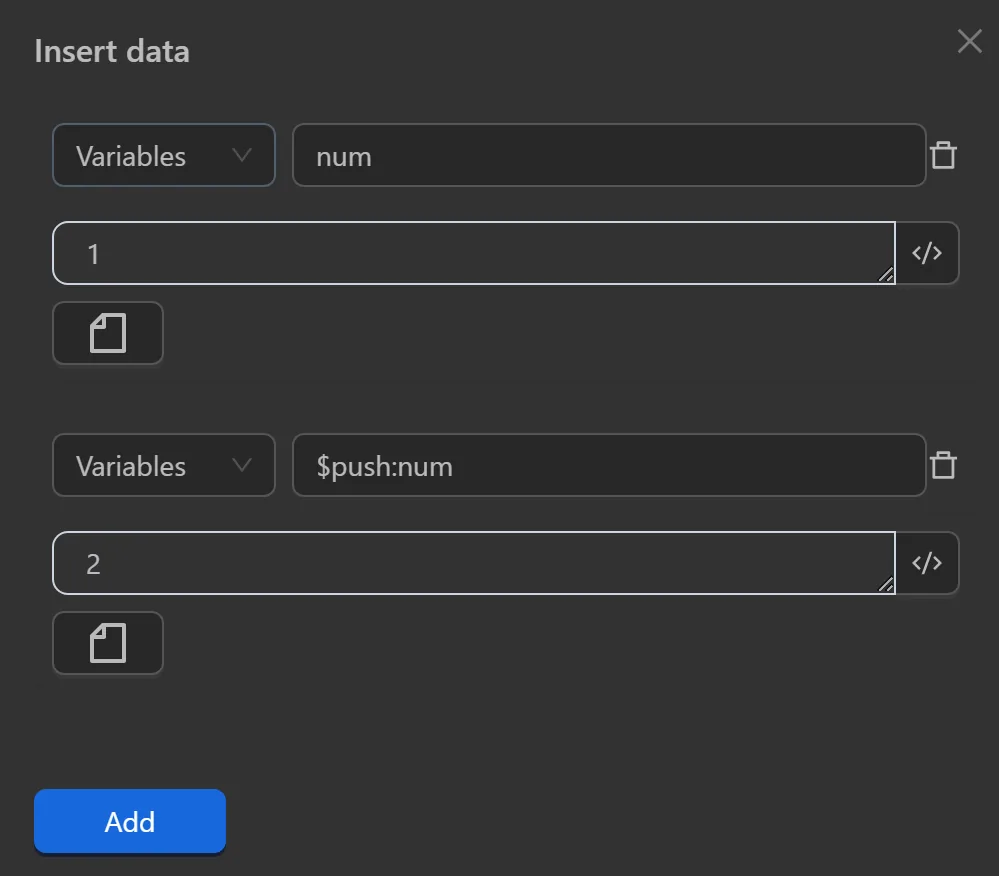
In some cases, you may want the variable to hold multiple values. In that case, you need to change the structure of the variable to an array. You should use the prefix $push: before the variable name. Automation will change the variable's data structure from holding a single value to an array that accepts multiple values. If the variable already has a value, that value will become the first element of the array, and new values will be added as subsequent elements. When assigning a value to the variable, instead of replacing the current value, Automation will append the new value after the existing ones.
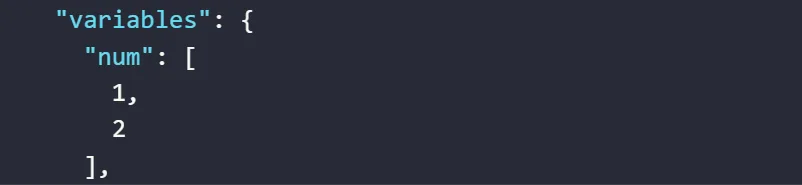
Example of appending values to a variable and converting it to an array structure
Normally, you would insert a value into a variable like and then to convert the num variable to an array and insert a value into it, configure the node as follows:
At that point, the num variable will display like this:
Accessing Variables
You can typically access the value of a variable created during the execution of any process using the expression {{variables.variable_name}}
Example of printing out a variable created during a workflow
First, open a link google.com using the Open URL node, then use the Get Tab URL node to get the current tab's link and insert it into the url variable. After that, use the Press Key node to output the value of the url variable using the expression: {{variables.url}}
However, if you've converted the variable structure into an array, the expression to retrieve the value will need to include the index of the element. The general formula is: {{variables.variable_name.index}}, where index is the position of the value in the array. To get the first value, use 0; for the second, use 1.
Example of printing a variable of array type created during a workflow
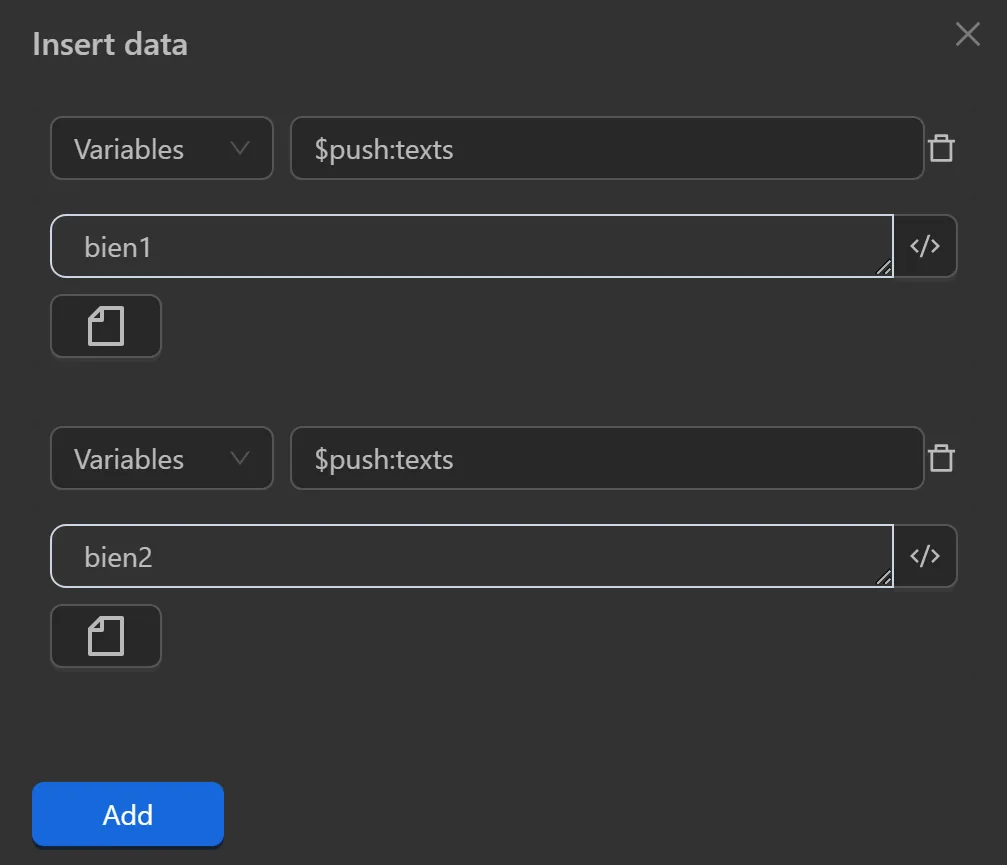
First, insert the text values bien1 and bien2 into the texts variable and prepend $push: to the variable name in the Insert Data node.
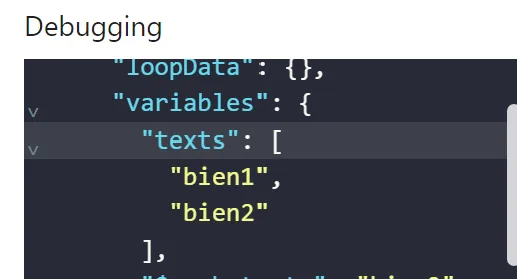
Then run the workflow with the Insert Data node. You see that the values bien1 and bien2 have been inserted into the texts variable and its data type has changed to an array, where the key is texts and the value is an array containing bien1 and bien2.
If you want to access the value bien1, you need to determine its position in the array. As shown in the image, the value is in the first position. The expression to retrieve that value is {{variables.texts.0}}. You can write this expression in the Log node. When you run the workflow, the result will be as follows: Similarly, if you want to get the value bien2, the expression would be {{variables.texts.1}}
At that point, running the node sequence in a real scenario will look like this
Note
You don't need to predefine a variable before using it. Once a value is inserted into a variable, it will be created and available for use in the workflow without prior declaration.
Note
You need to run the nodes that retrieve values in the same execution as the nodes that assign values to the variables. Running them in separate executions will not retrieve the variable's value.